SCADA & MQTT Integration with SMX-RNS20
Overview
Section titled “Overview”The SMX-RNS20 can act as an IoT gateway, polling data from connected PLCs and HMIs via its Remote IO drivers (Siemens S7, Modbus TCP, OPC UA) and forwarding that data to an external MQTT broker or cloud SCADA platform.
This enables real-time dashboards and alerts without requiring SCADA software to have a direct VPN connection to the machine network.
MQTT Publisher Configuration
Section titled “MQTT Publisher Configuration”- First, configure Remote IO data points (see the relevant Remote IO guides). You need at least one active data source before configuring MQTT.
- Log in to the SMX-RNS20 web interface → Cloud → MQTT.
- Click Add Publisher. Enter your broker’s address (hostname or IP), port (default 1883 for plain, 8883 for TLS), and credentials if required.
- Set the topic prefix (e.g.,
factory/line1/smx-001/). - Map each Remote IO data point to an MQTT topic. The SMX publishes the value, timestamp, and quality as a JSON payload.
- Set the publish interval (cyclic) or configure on-change publishing.
- Save. The device will start publishing immediately — check your broker’s topic tree to verify.
SCADA Integration
Section titled “SCADA Integration”Most modern SCADA systems support MQTT subscriptions. Common integrations:
| System | Integration |
|---|---|
| Ignition (Inductive Automation) | MQTT Engine module — subscribe to the SMX topic prefix directly |
| AVEVA (Wonderware) | System Platform MQTT client or InTouch Access Anywhere |
| Grafana | Use the MQTT data source plugin (e.g., via InfluxDB → Telegraf MQTT consumer) |
| Node-RED | MQTT In node → any downstream processing or dashboard node |
Screenshots — Architecture Overview
Section titled “Screenshots — Architecture Overview”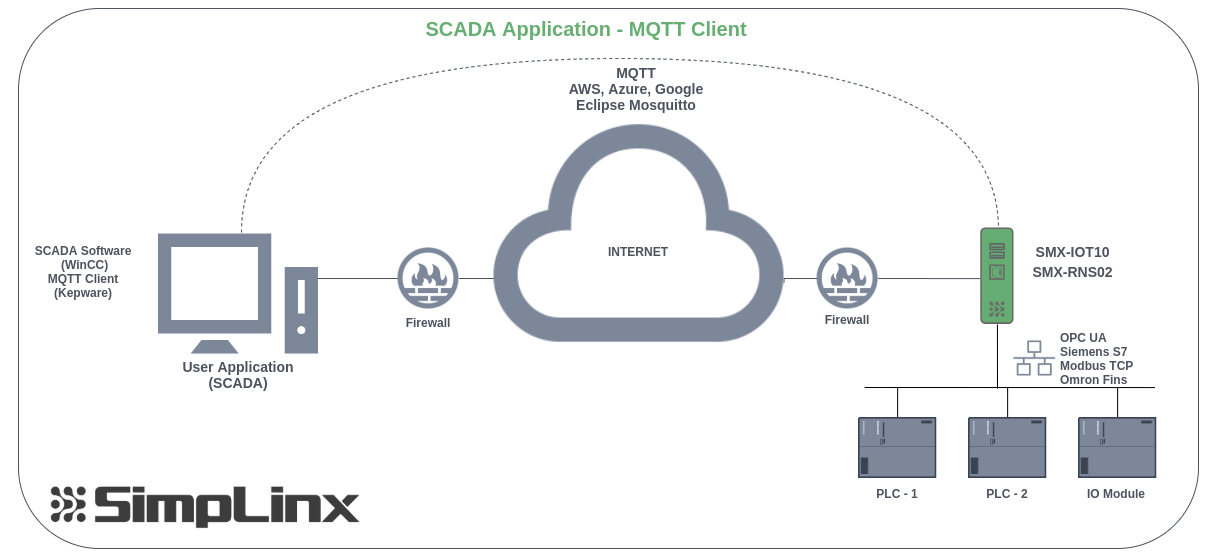 Architecture — data flow from SMX-RNS20 via AWS IoT Core MQTT to Kepware and WinCC SCADA
Screenshots — AWS IoT Core Setup
Section titled “Screenshots — AWS IoT Core Setup”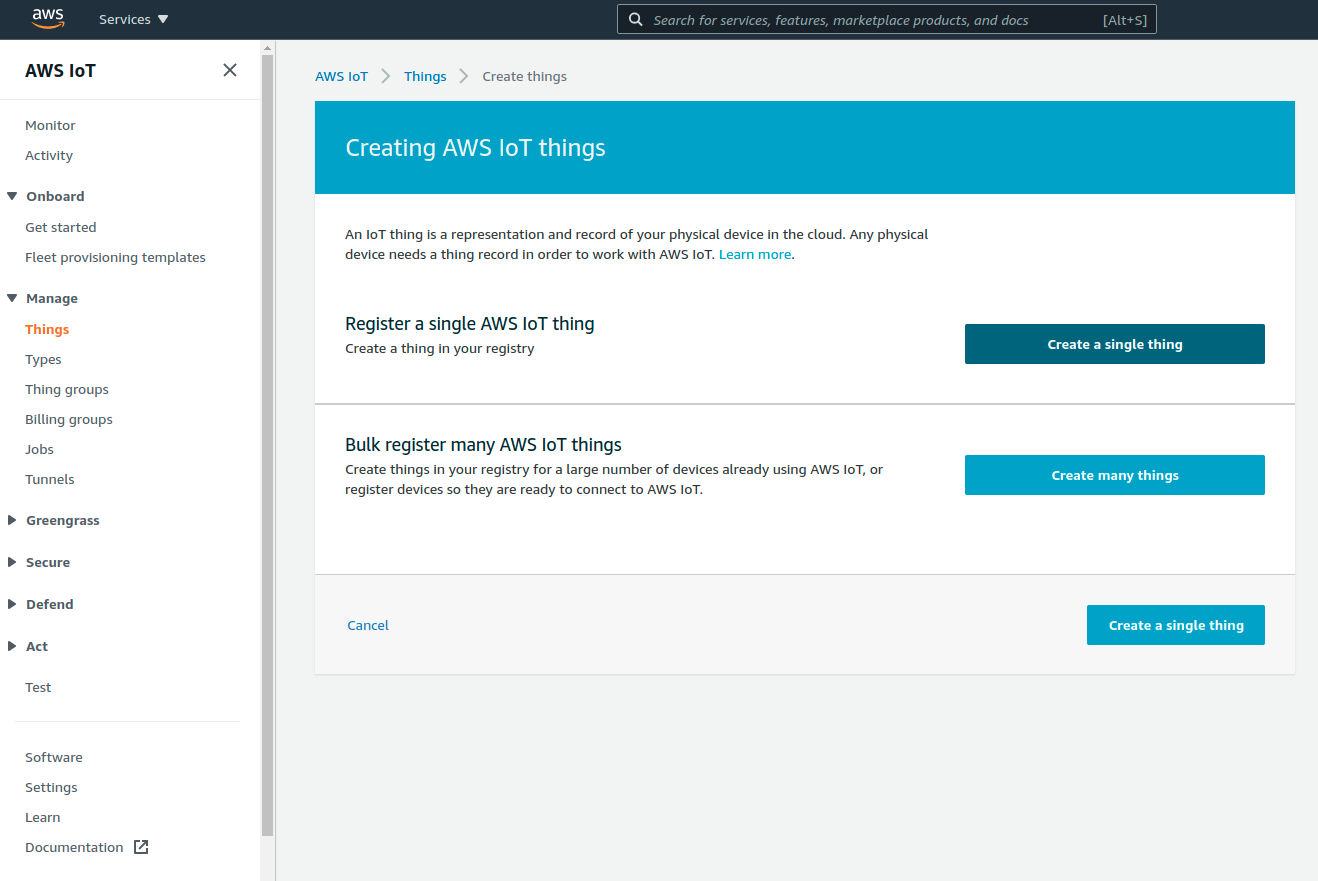 AWS IoT Core — Manage → Things: click Create single thing
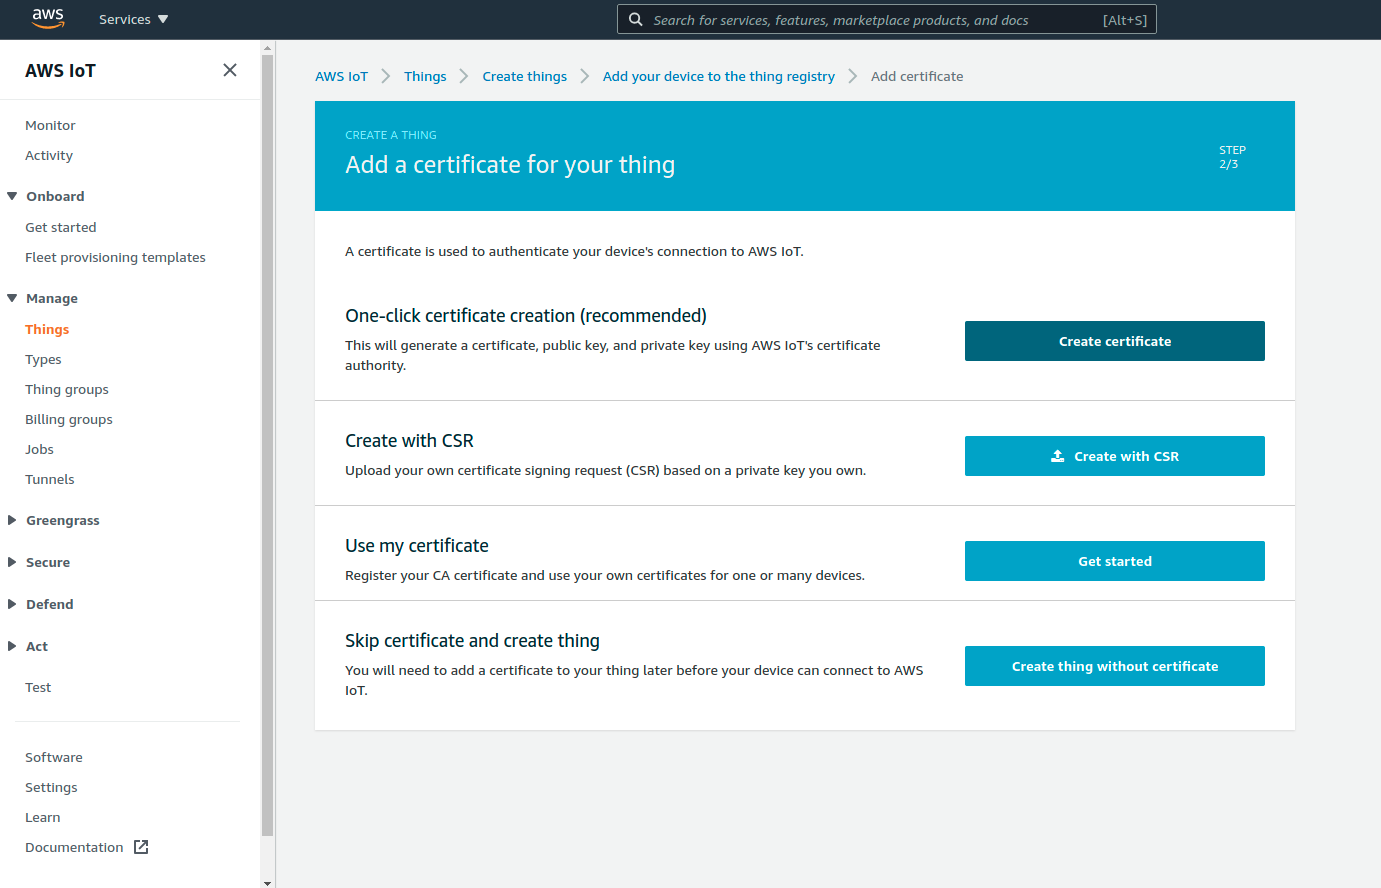 AWS IoT Core — certificate creation step
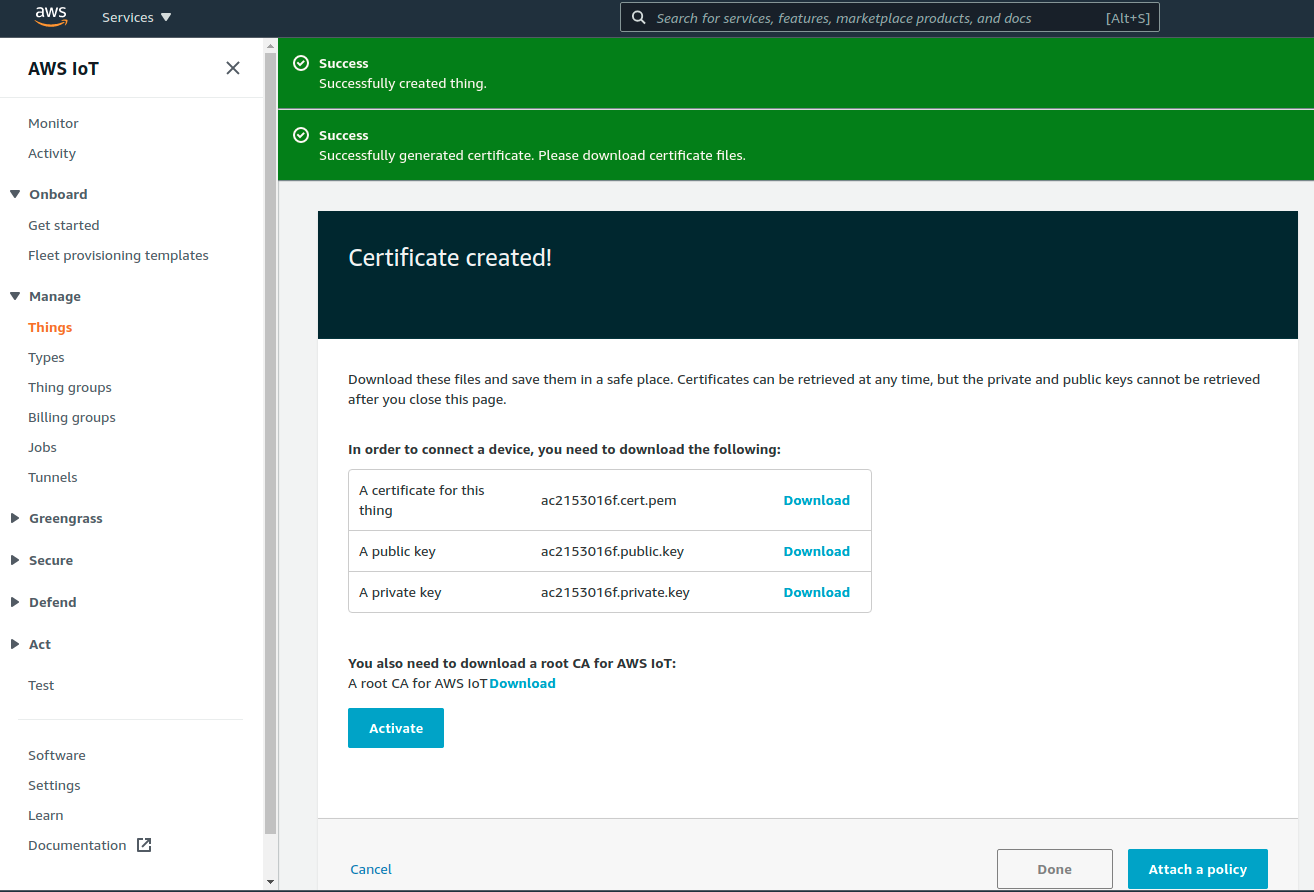 Download all certificate files: device certificate, private key, Amazon Root CA 1
 AWS IoT Core Test — subscribe to your topic to verify incoming MQTT data
Screenshots — SMX-RNS20 Configuration
Section titled “Screenshots — SMX-RNS20 Configuration”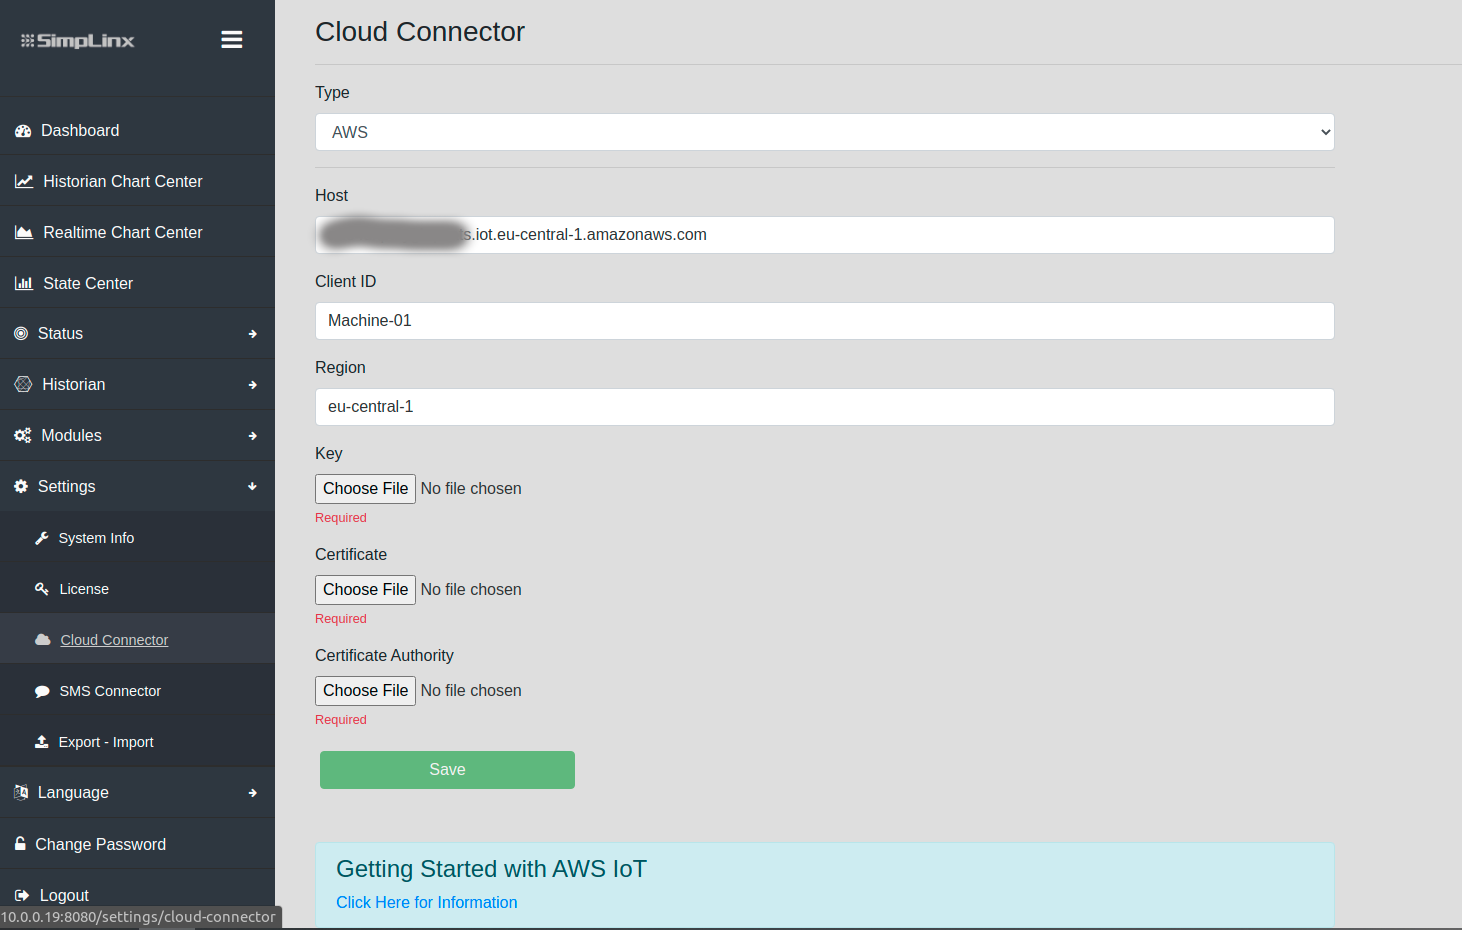 Settings → Cloud Connector: configure Host, Client ID, Region, certificate files
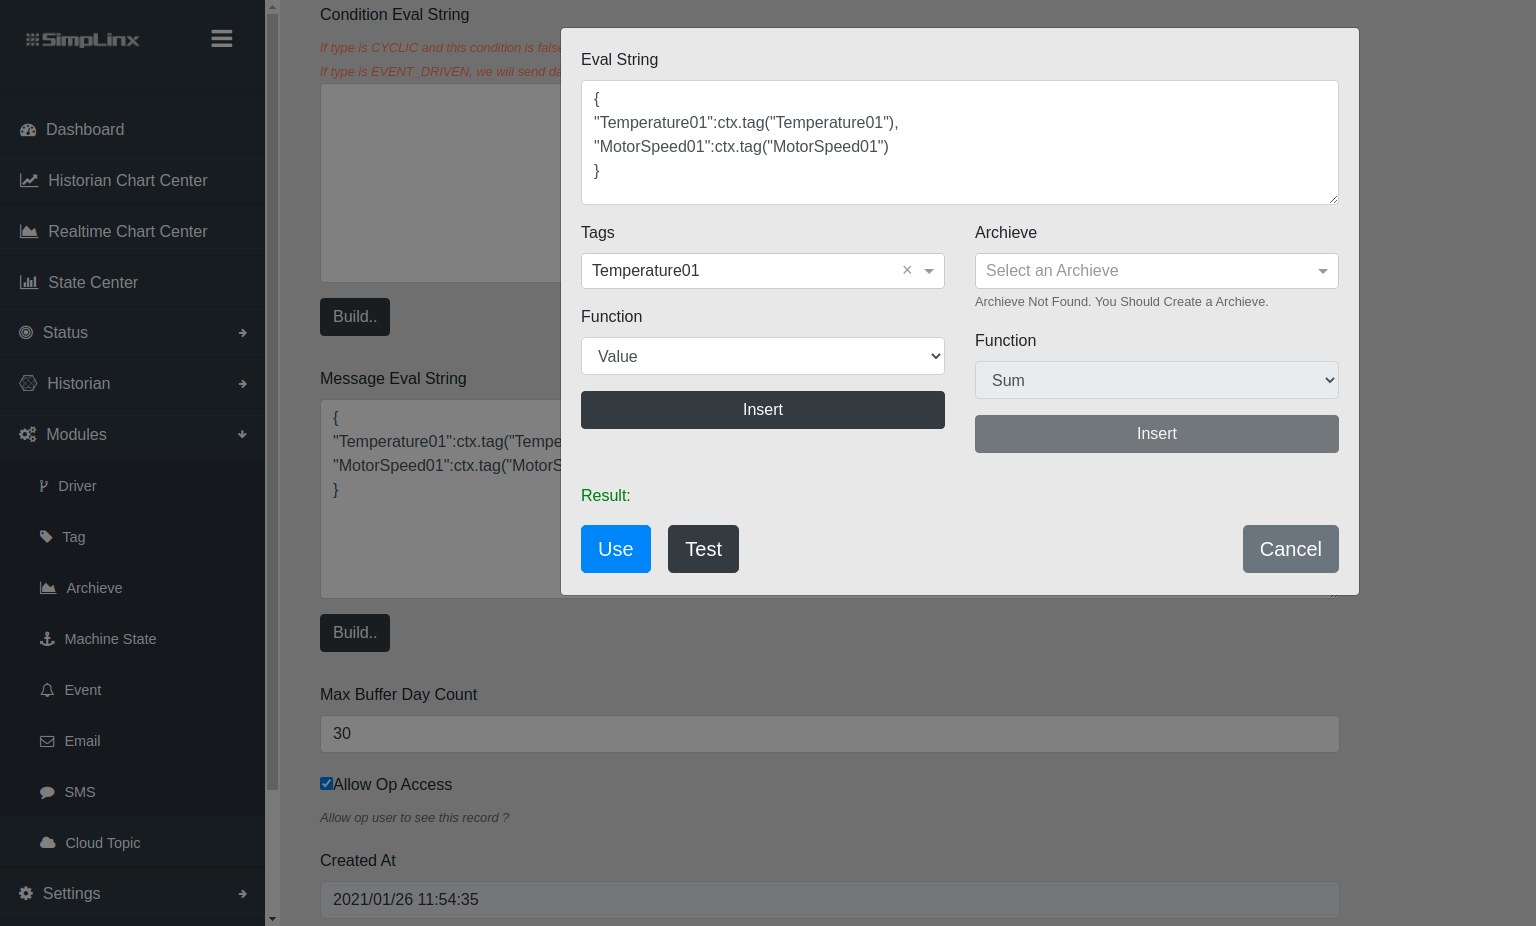 Modules → Cloud Topic: select which data to publish
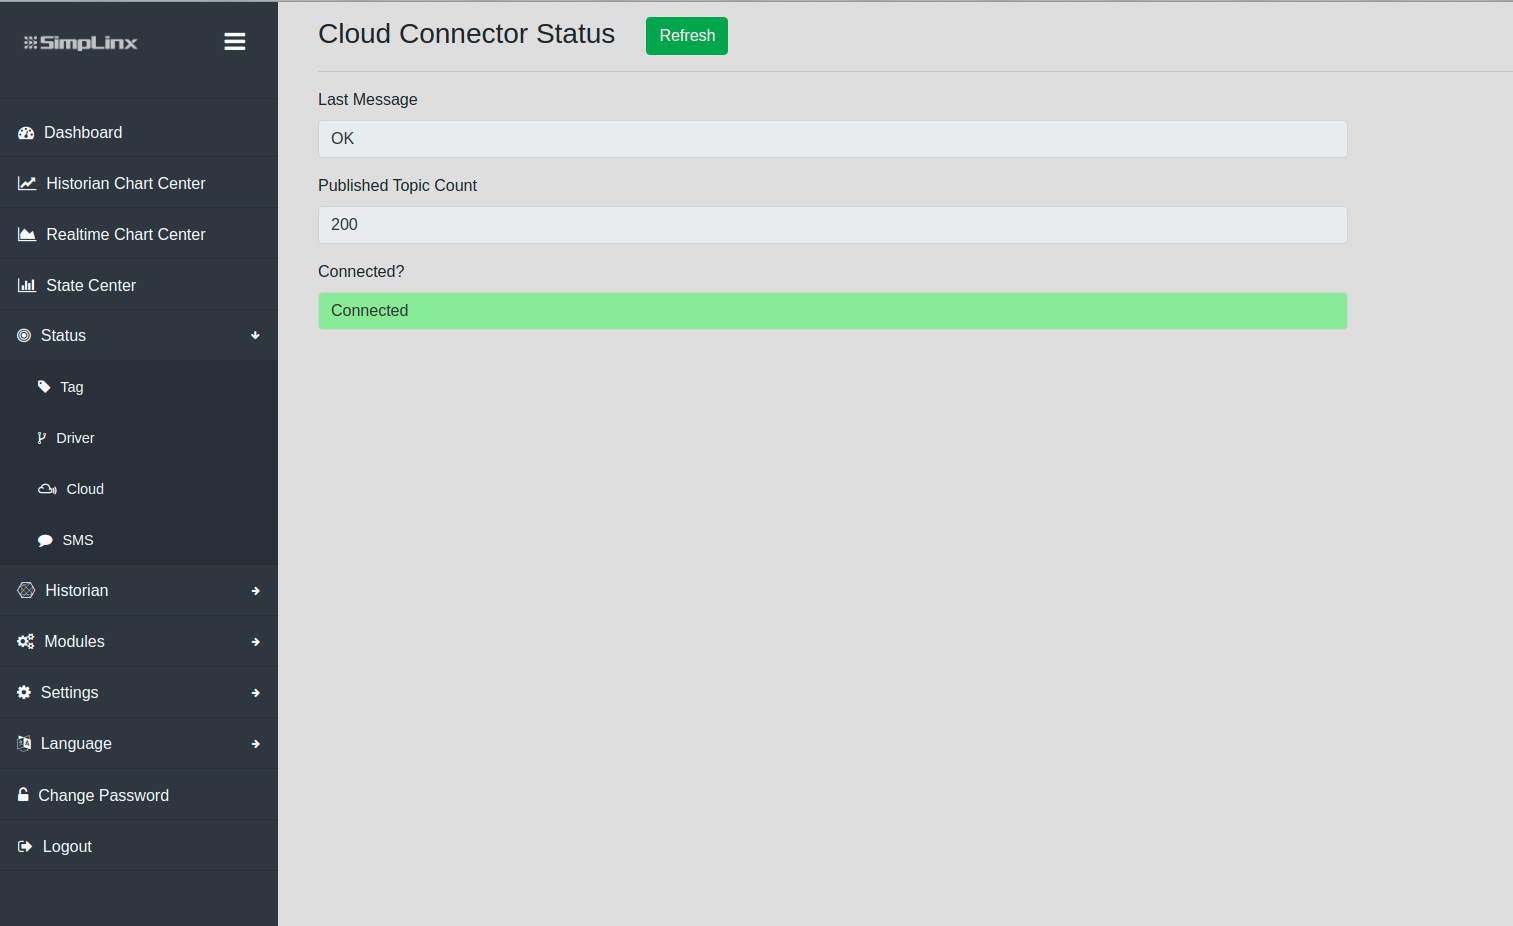 Status → Cloud: confirm MQTT connection is active
Screenshots — Kepware MQTT Client Setup
Section titled “Screenshots — Kepware MQTT Client Setup” Kepware KEPServerEX — start installation
 Select Custom installation to choose MQTT Client component
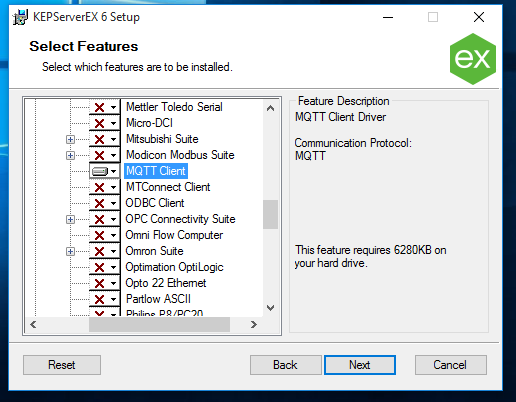 Select the MQTT Client component during installation
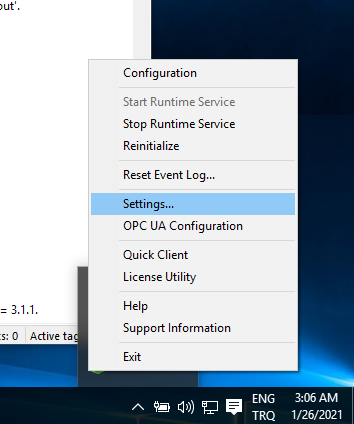 Kepware system tray: open Settings → Certificate Store
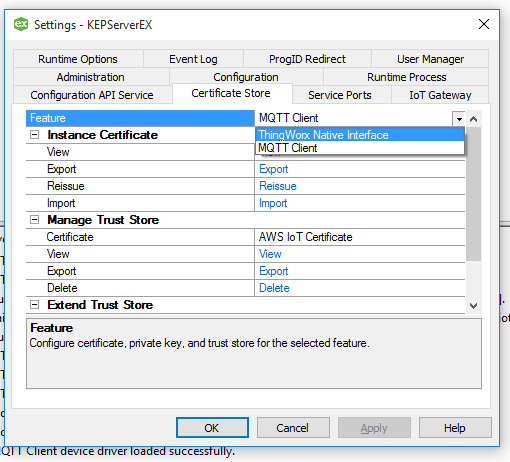 Certificate Store → MQTT Client: import the AWS certificates downloaded earlier
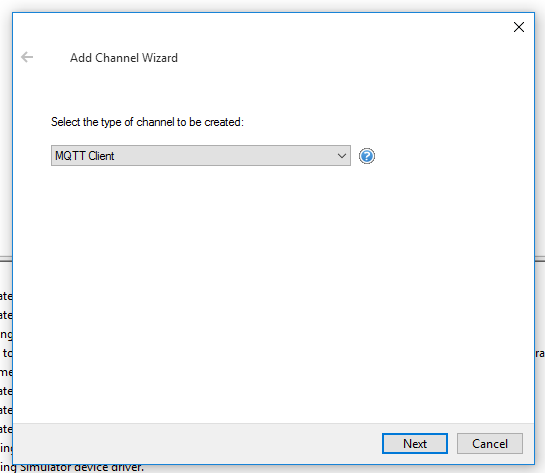 Kepware Configuration: create a new channel
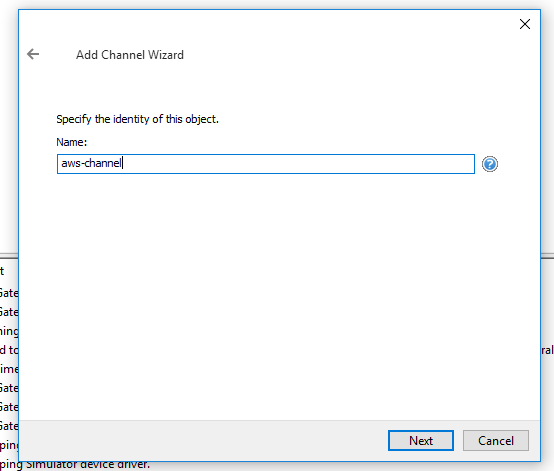 Name the MQTT channel
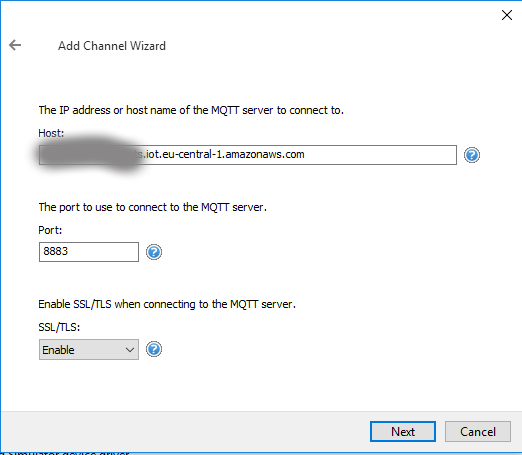 Channel settings: AWS IoT endpoint, port, client ID
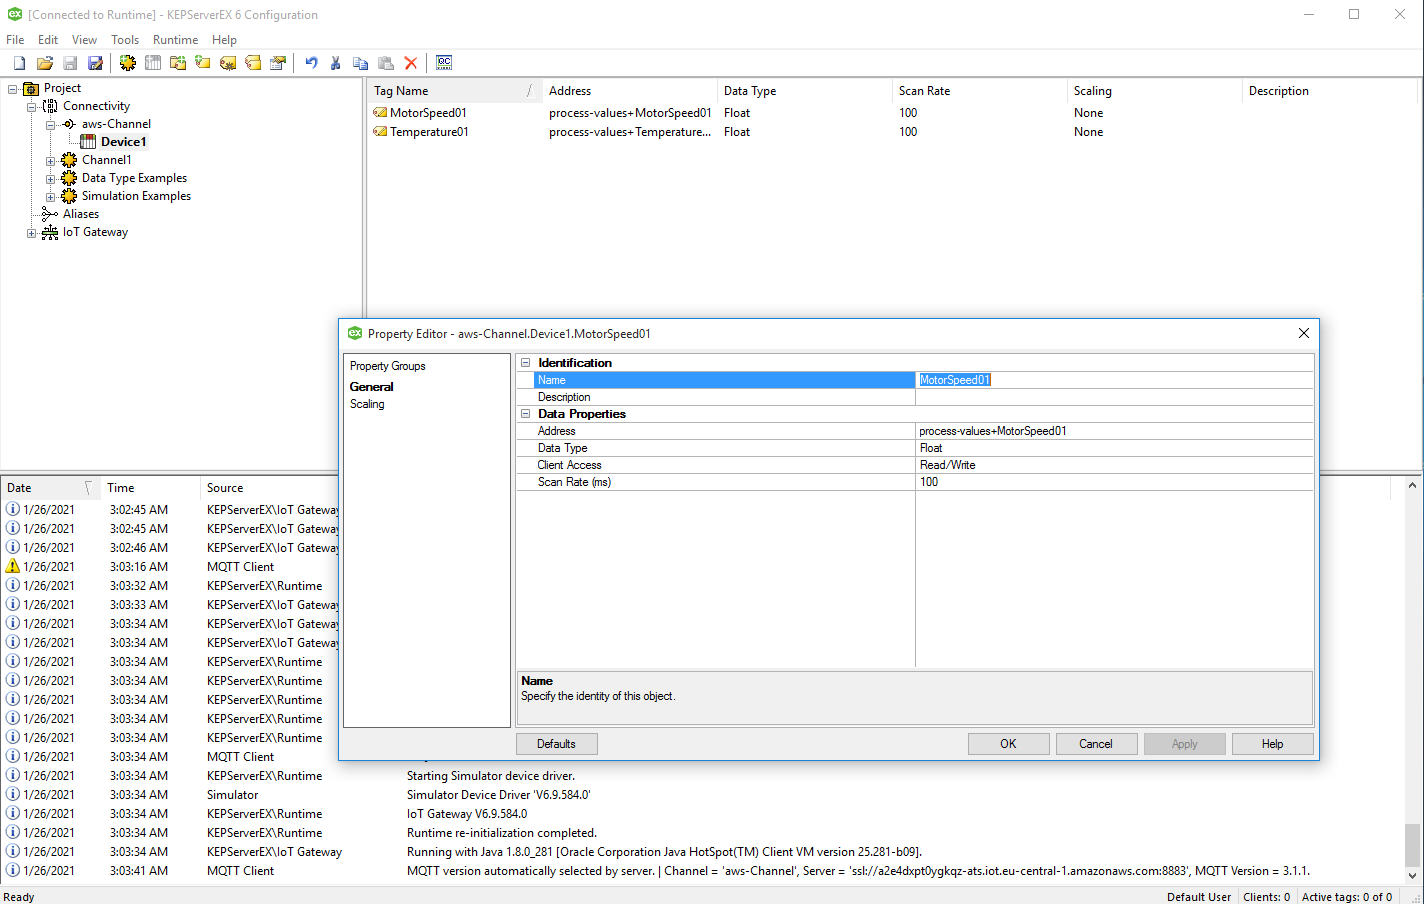 Add tags under the channel — use TOPIC_NAME+VAR_NAME format
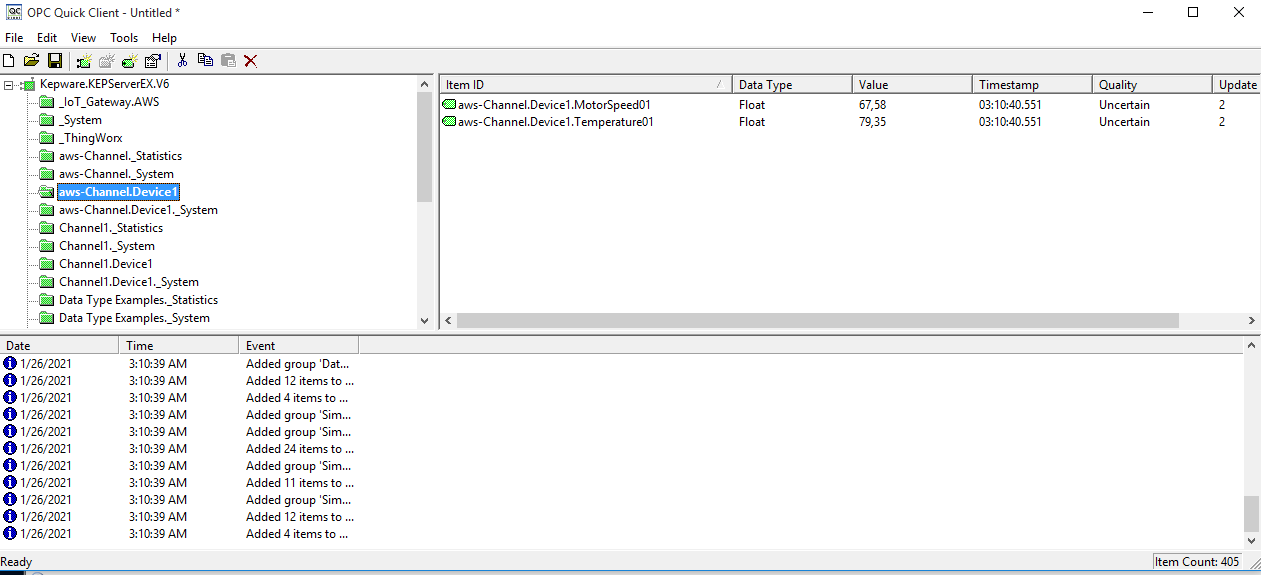 OPC Quick Client — confirm Kepware is reading MQTT values successfully
Screenshots — WinCC Setup
Section titled “Screenshots — WinCC Setup”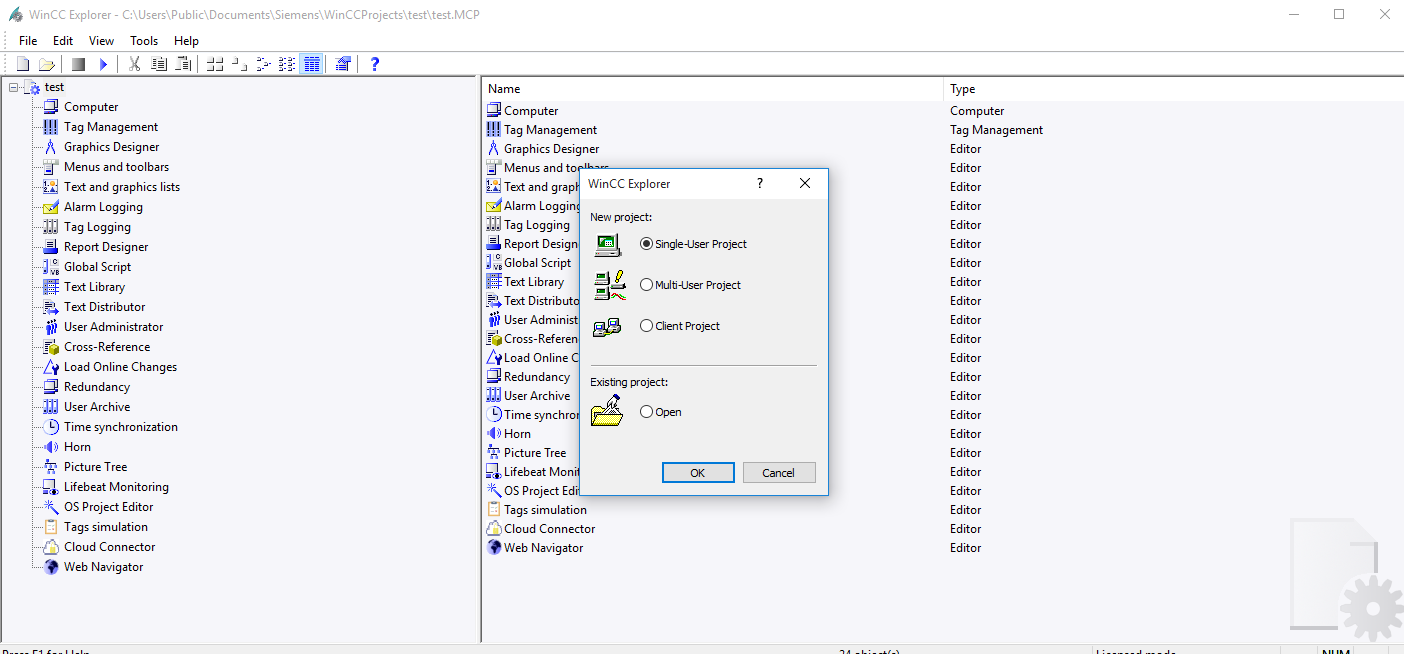 WinCC: create new project
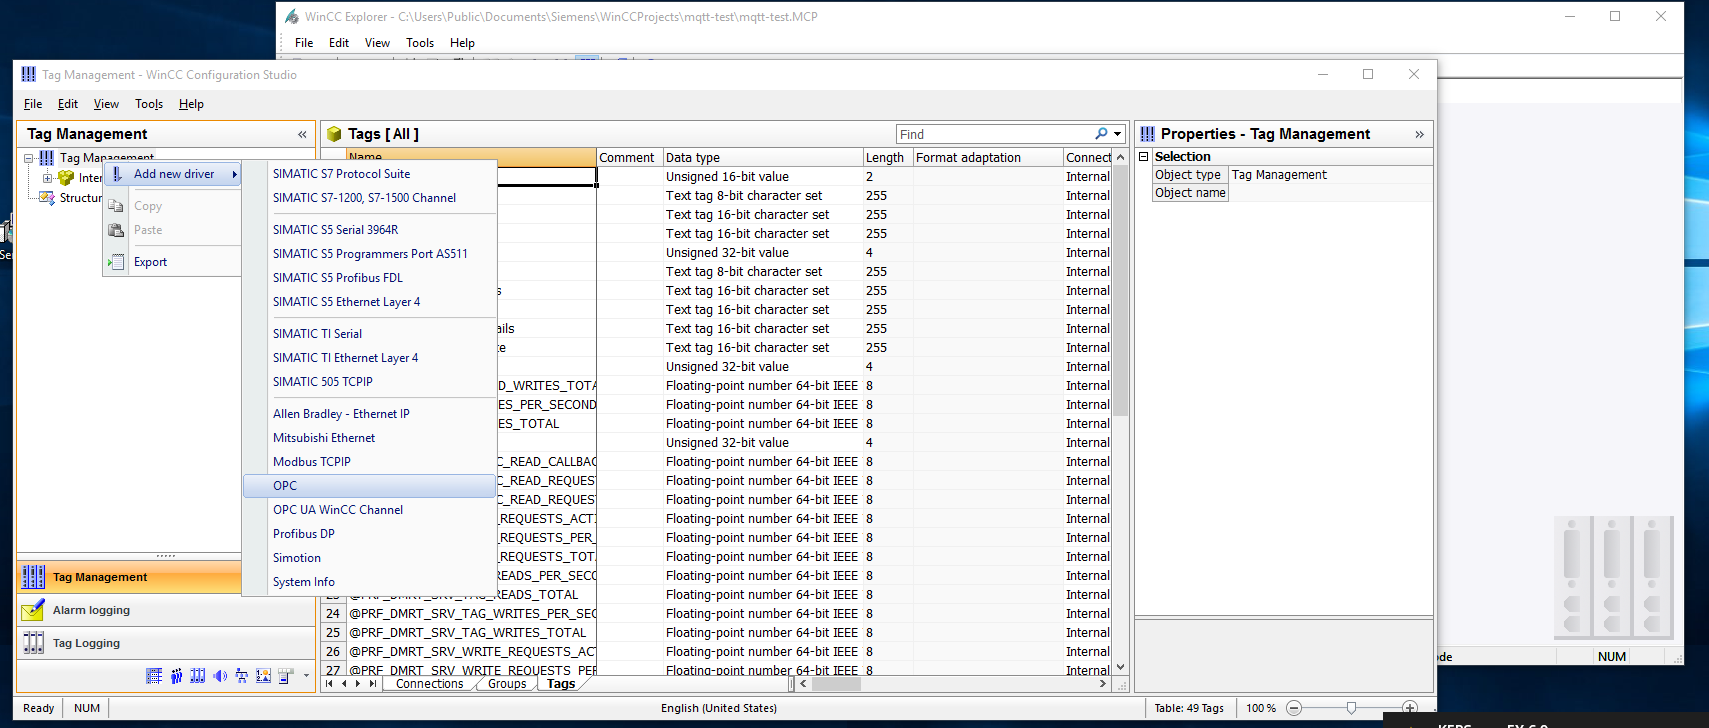 Tag Manager: Add new driver → OPC
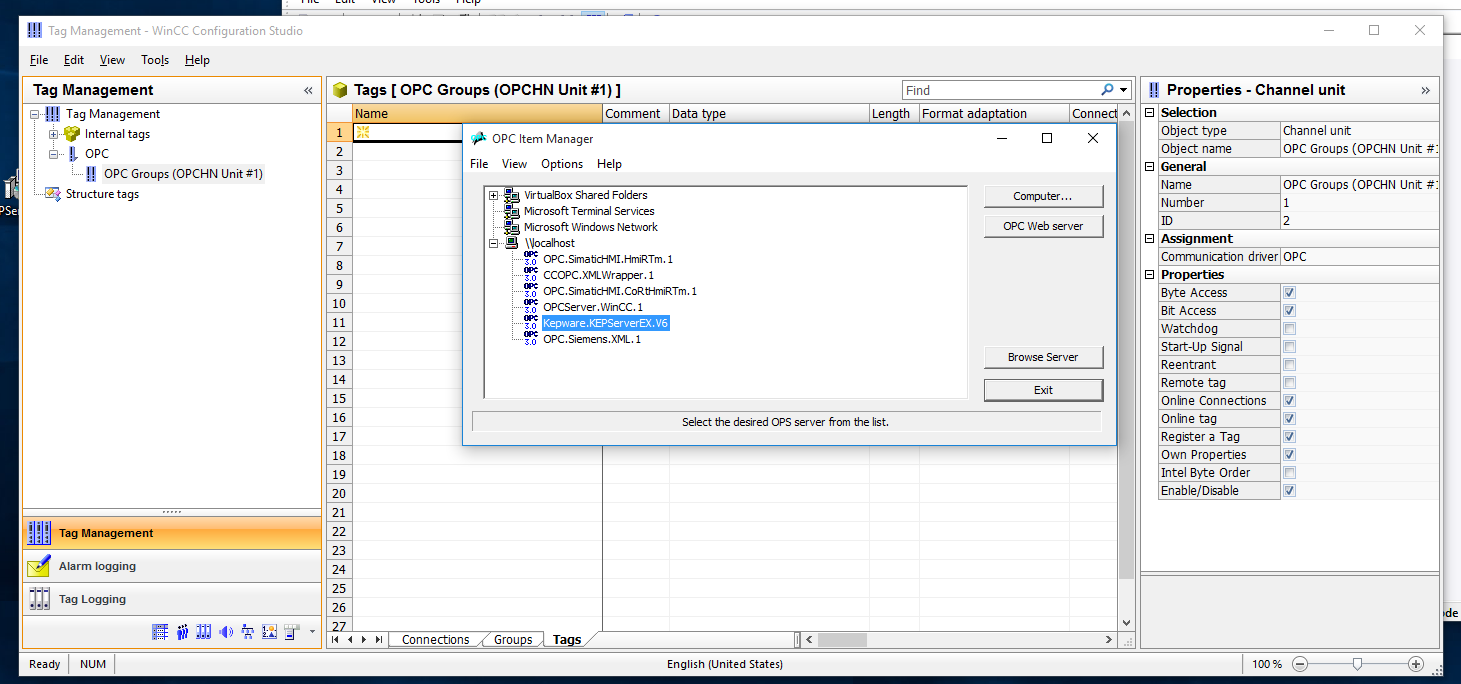 Select the Kepware OPC server from the computer list
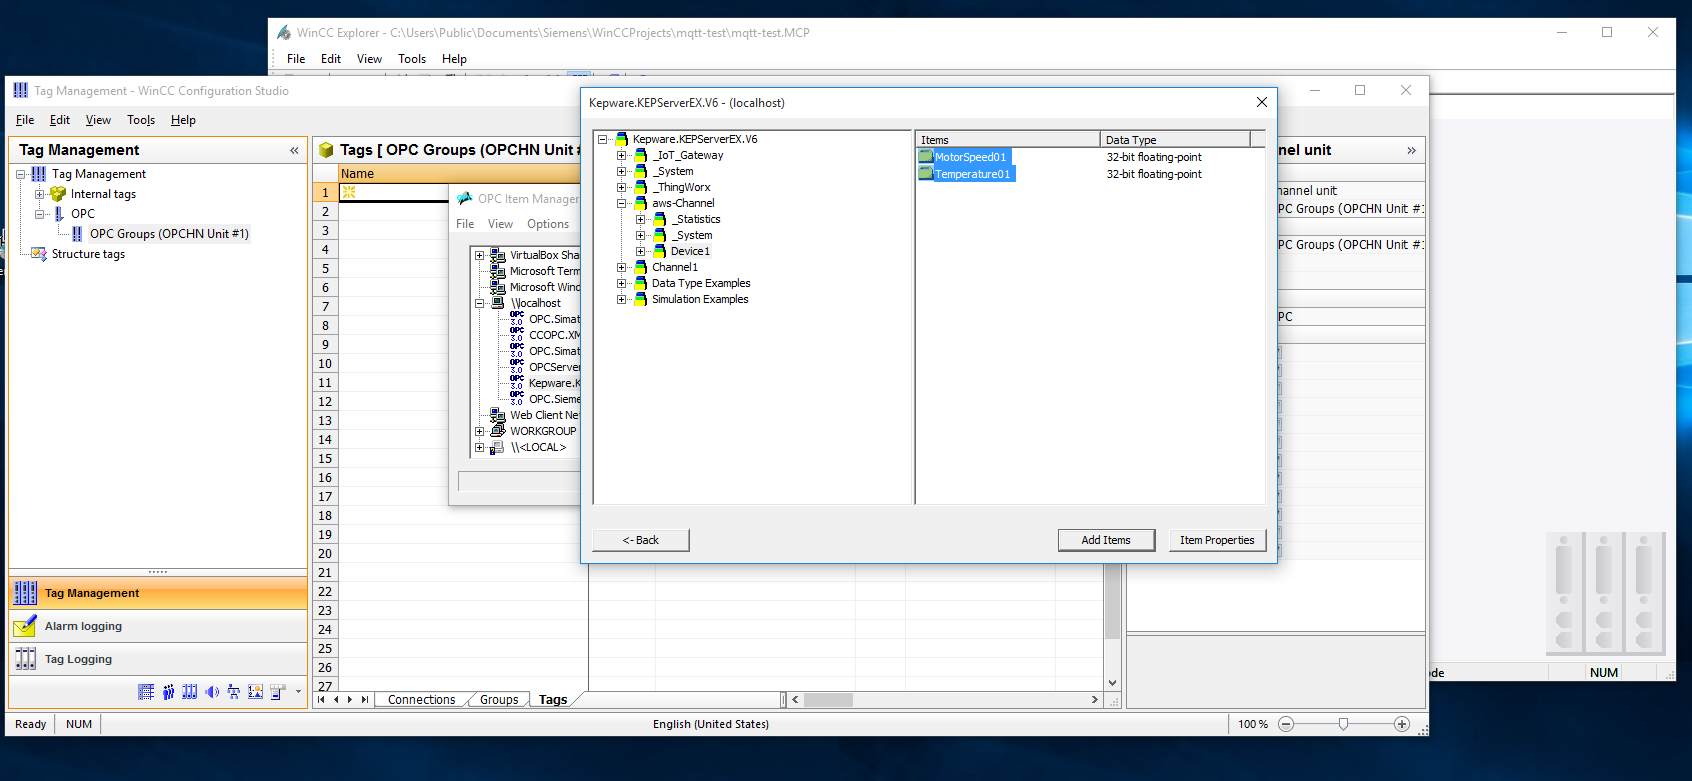 Browse Kepware tags and add them to the WinCC project
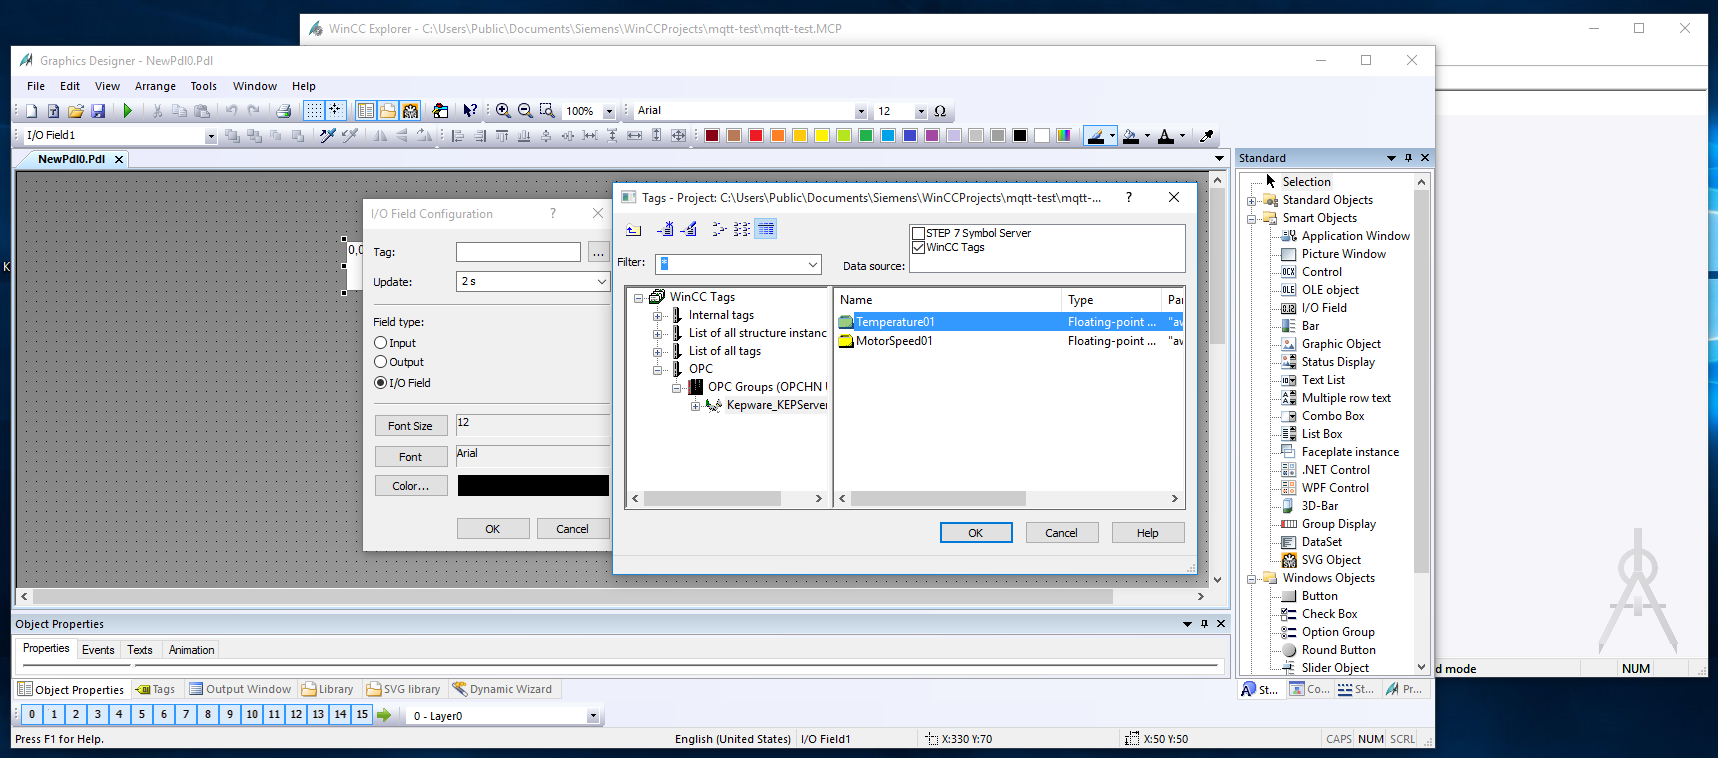 Graphic Designer: add displays bound to the MQTT-sourced tags
 SCADA page layout in Graphic Designer
 Running project — live values from the field device via SMX-RNS20 → AWS IoT Core → Kepware → WinCC