Omron FINS
Driver Setup
Section titled “Driver Setup”- Select Modules → Driver from the menu.
 Modules menu — select Driver
- In the Drivers page click + to add a new driver.
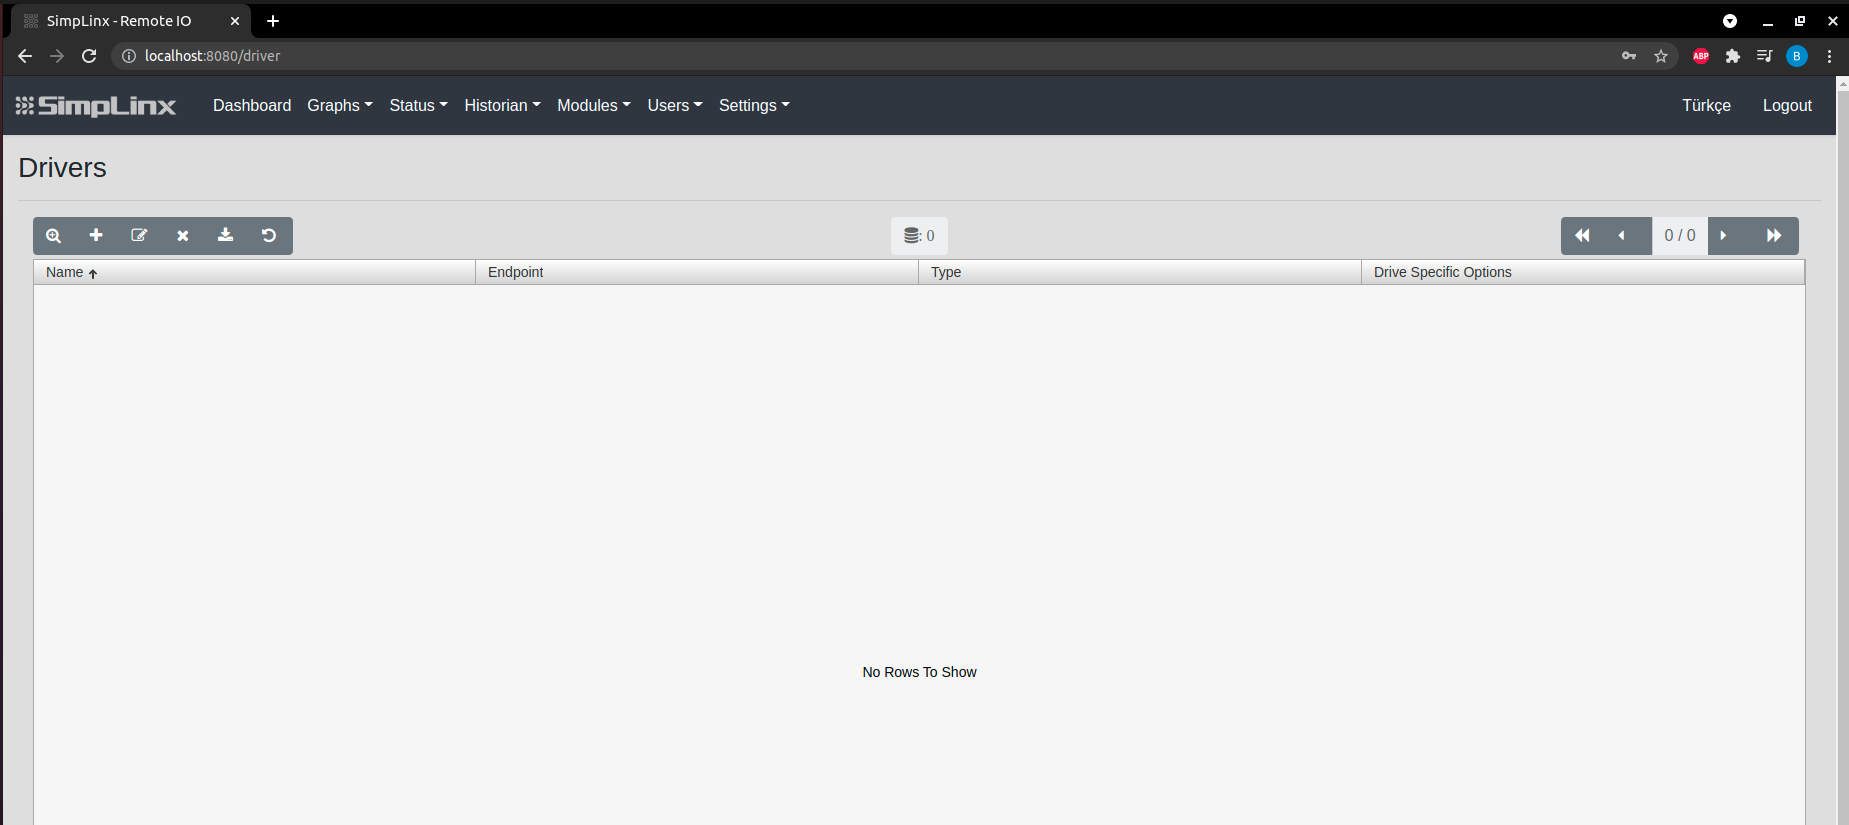 Drivers page — click + to add
- Configure the driver:
- Name — any descriptive name, e.g.
Omron - Endpoint — IP address of the Omron PLC
- Type — select OMRON FINS
- Driver Specific Options — set port and timeout
- Name — any descriptive name, e.g.
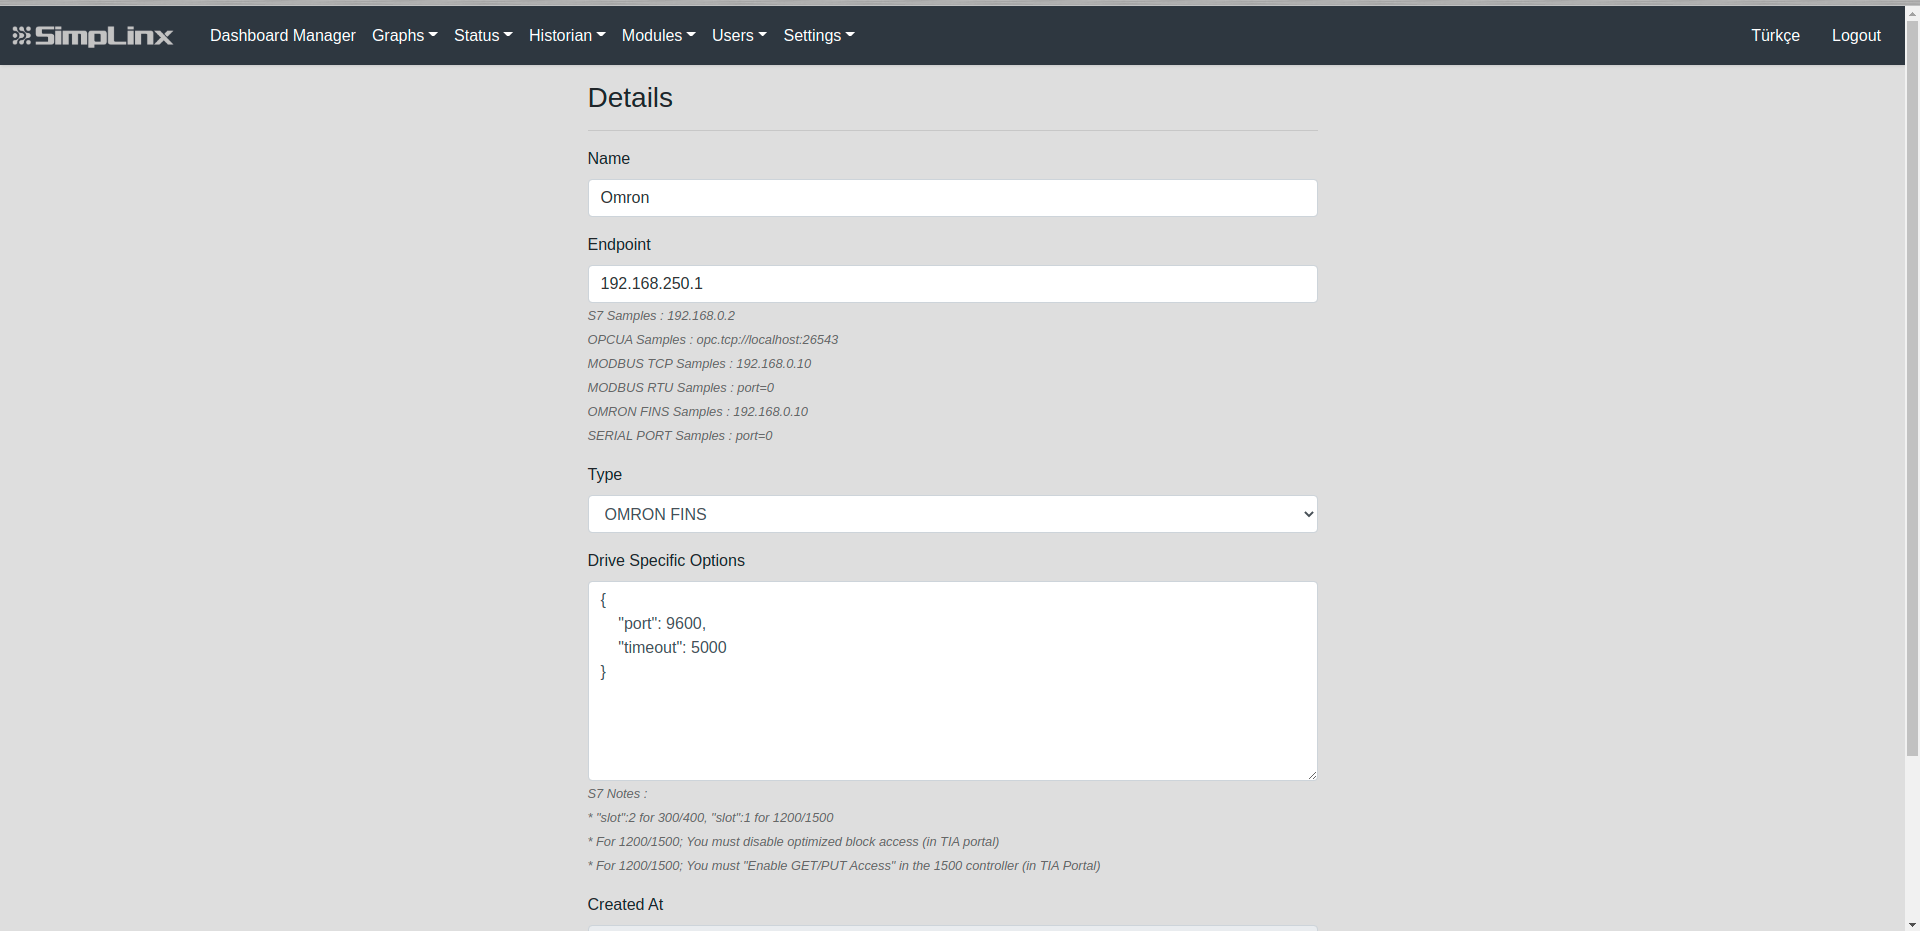 Driver settings — Type: OMRON FINS, endpoint, port, timeout
- Click Save. Then add a new controller and set the system configuration for Omron FINS.
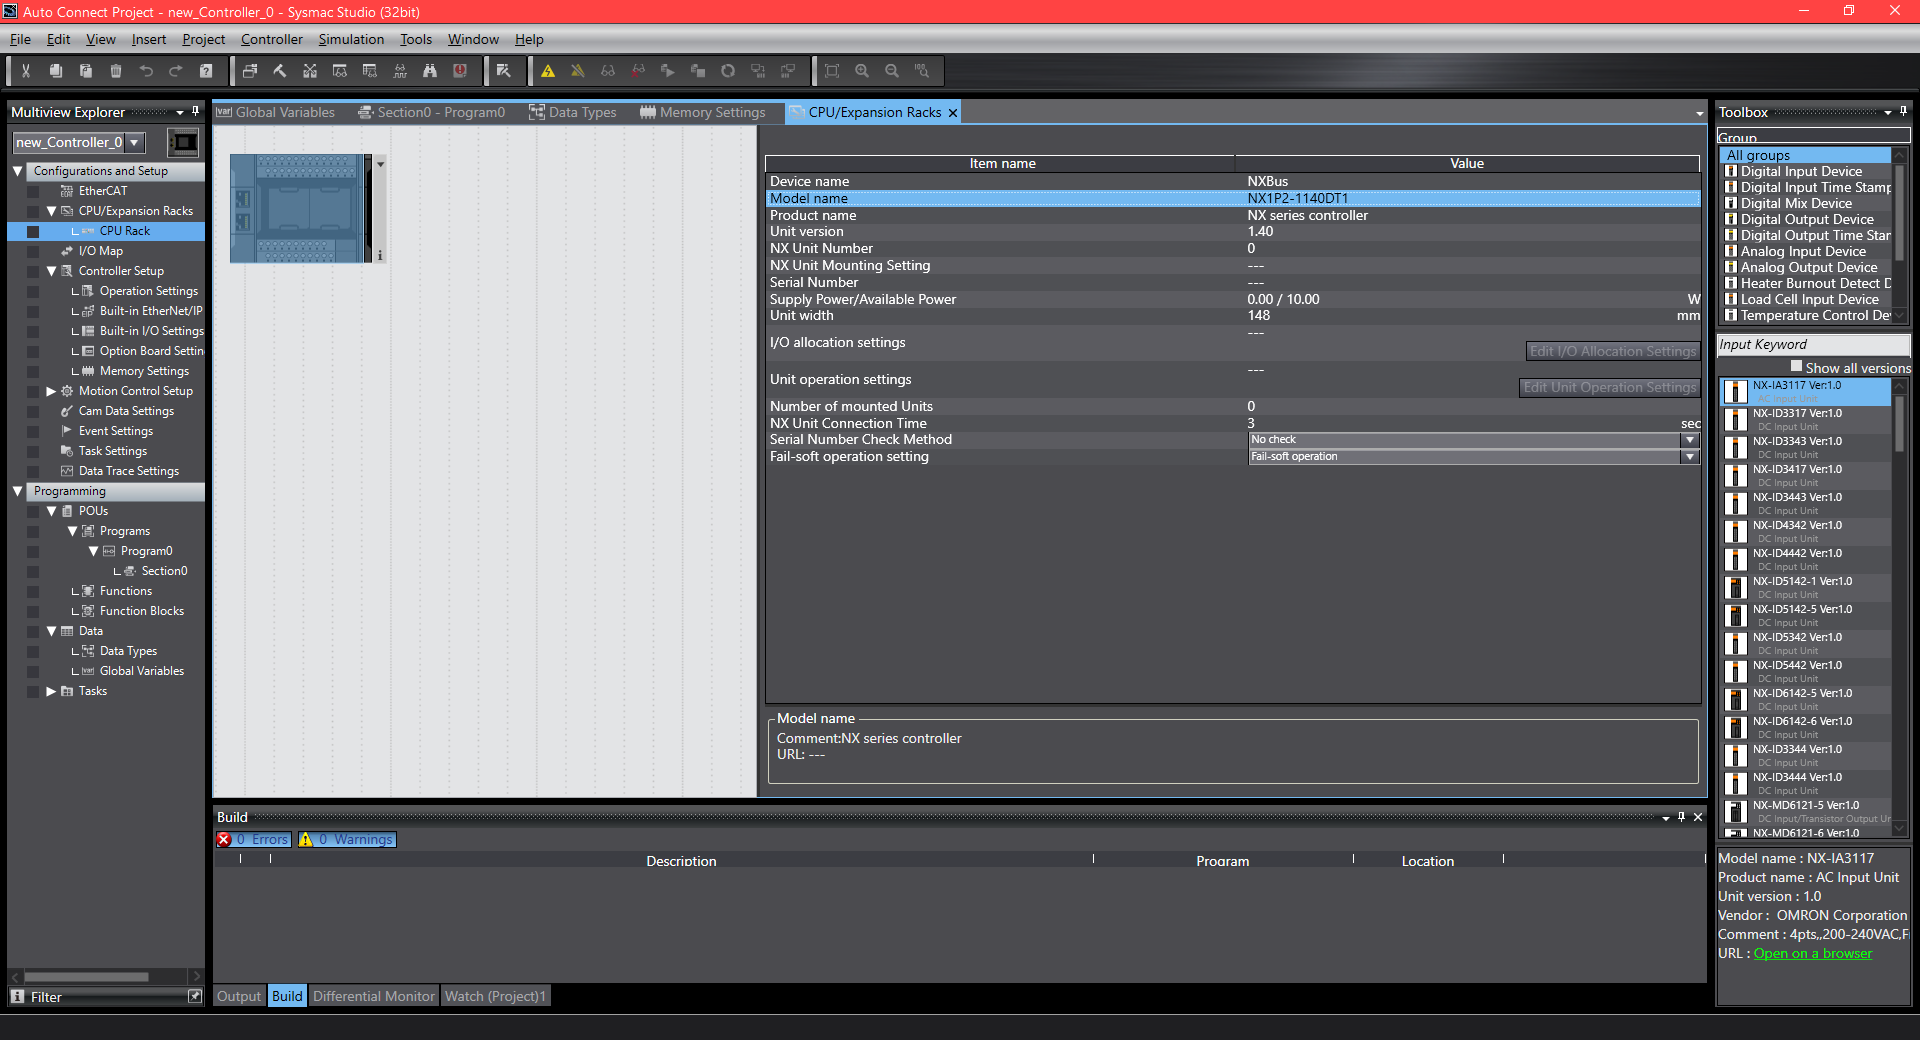 Controller setup — system configuration for Omron FINS
Tag Setup
Section titled “Tag Setup”- Go to Modules → Tag and click + to add a new tag.
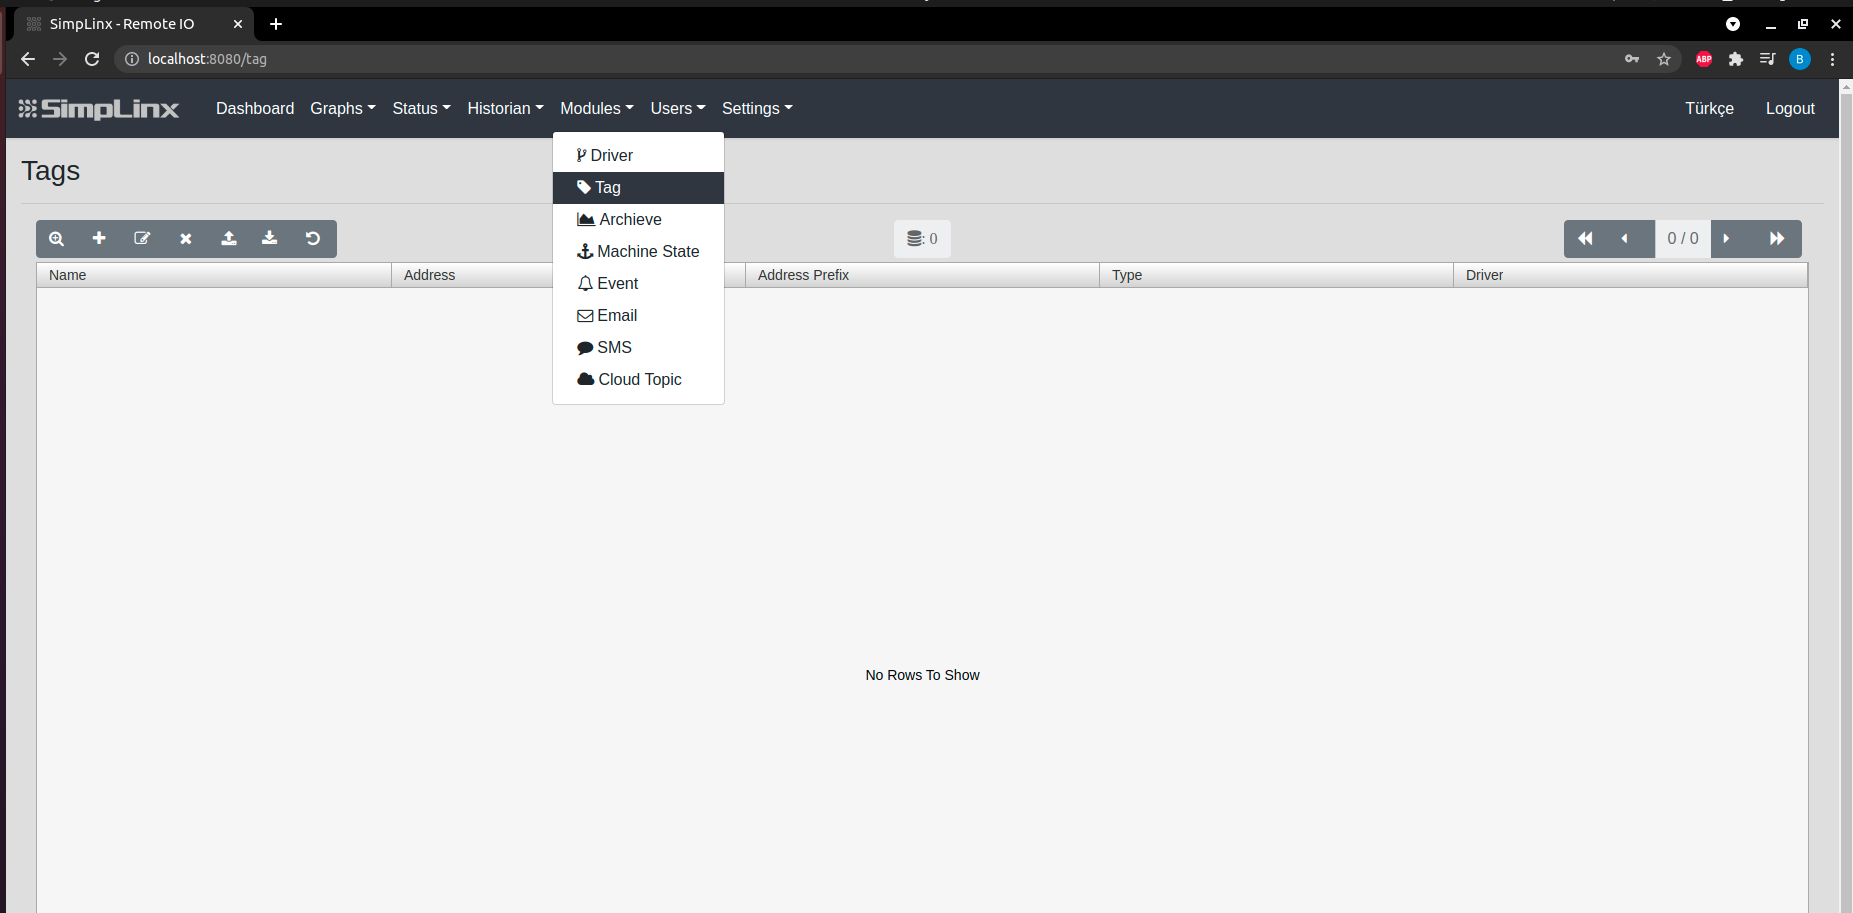 Tags page — click + to add
- Configure the tag:
- Name — descriptive tag name
- Type — select the appropriate data type
- Address — Omron FINS tag address
- Address Prefix — optional prefix
- Conversion Script — optional math operations
- Driver Name — select the Omron driver created above
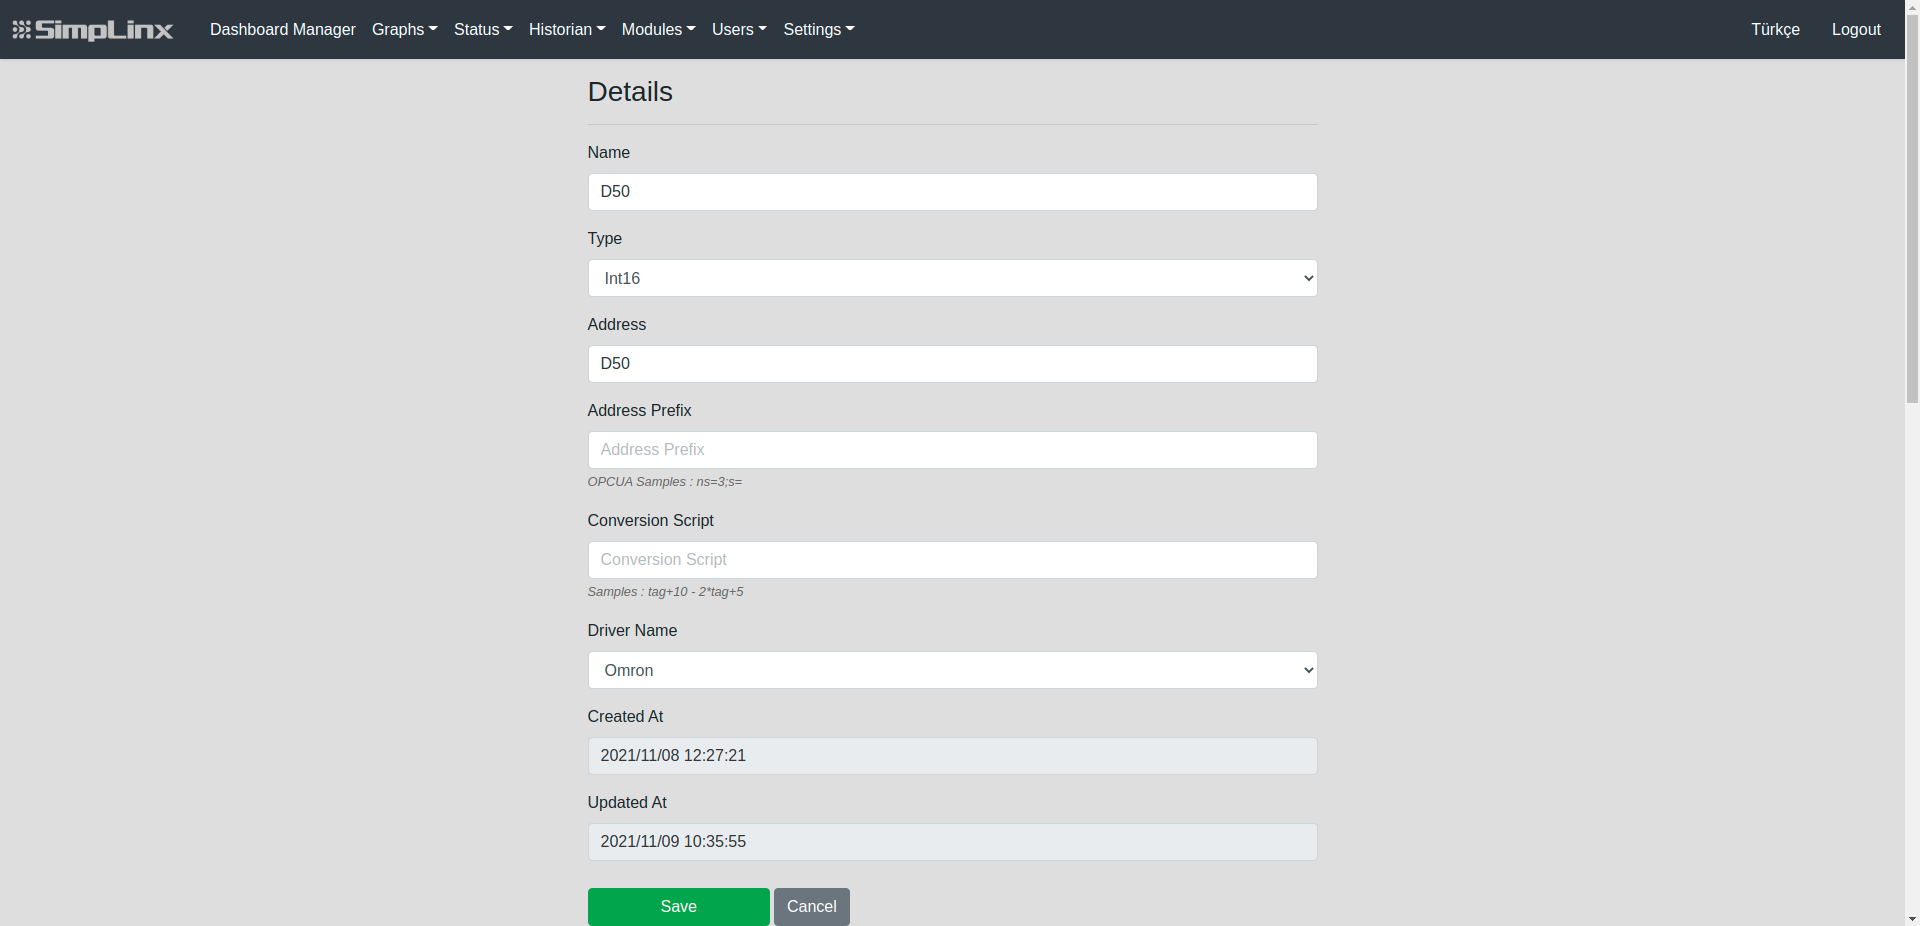 Tag details — address, type, driver assignment
- Click Save.
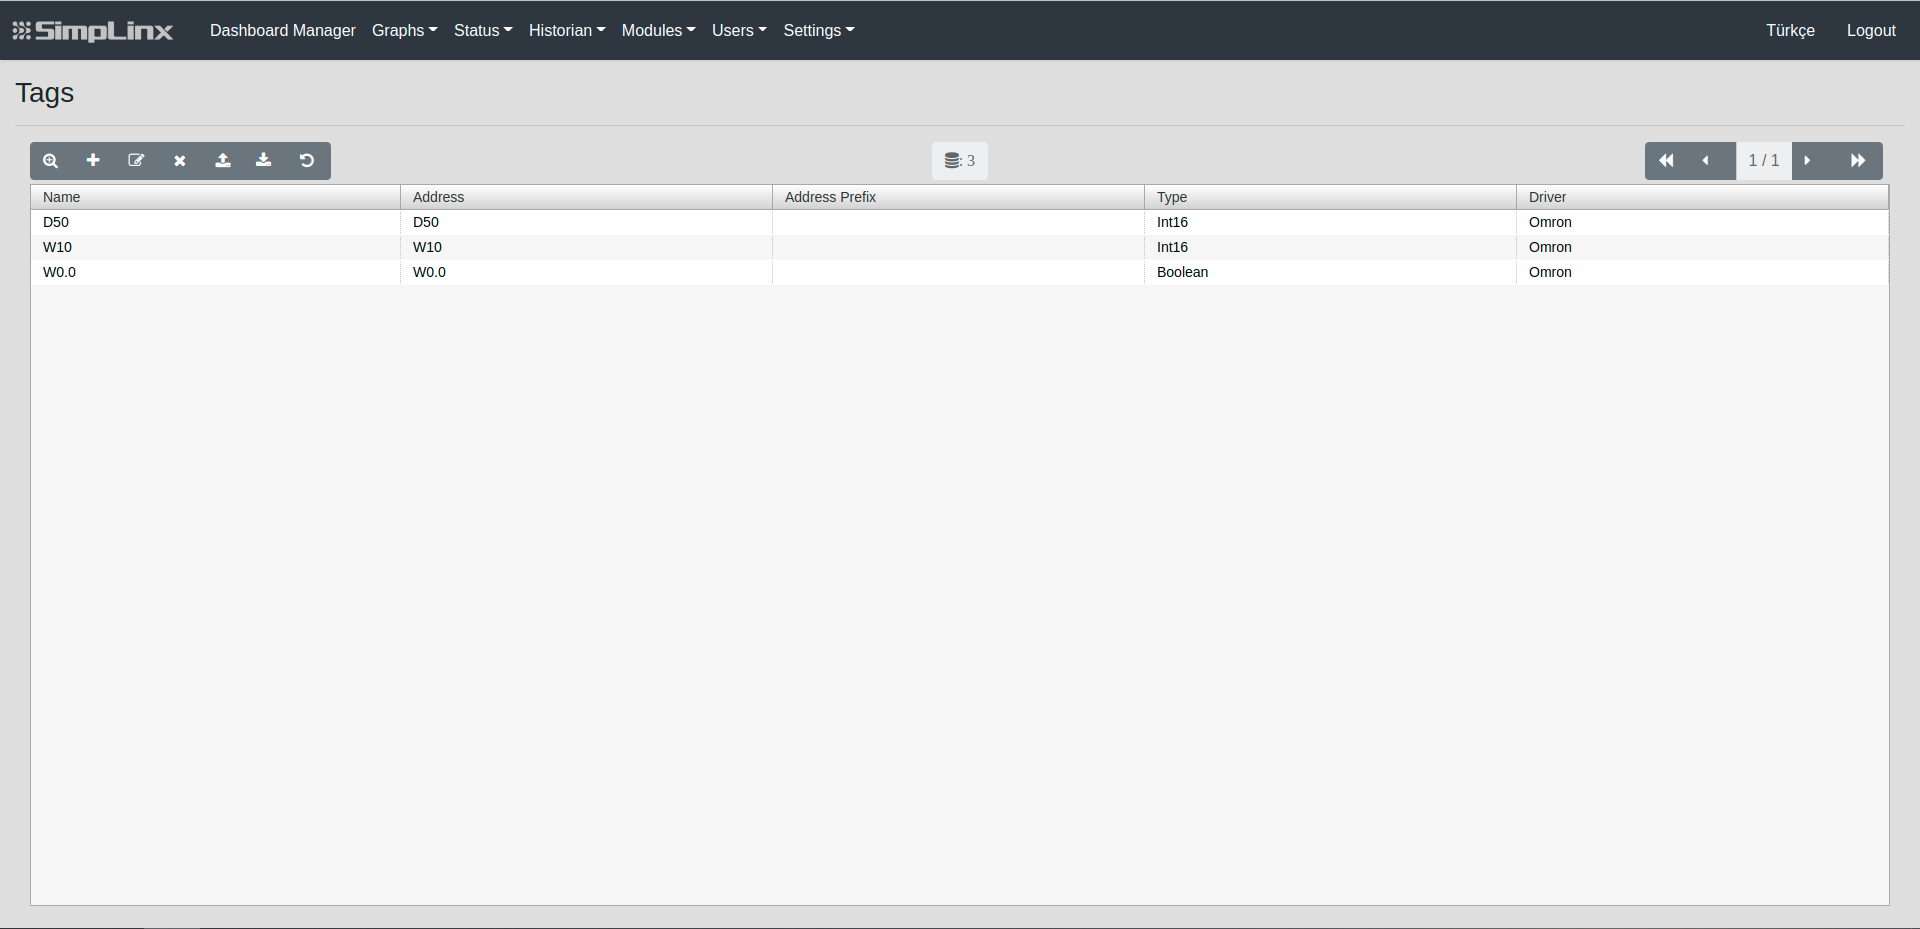 Tag added successfully
Omron PLC Configuration
Section titled “Omron PLC Configuration”- In the Omron PLC configuration, go to Built-in EtherNet/IP Port, set the configuration and save.
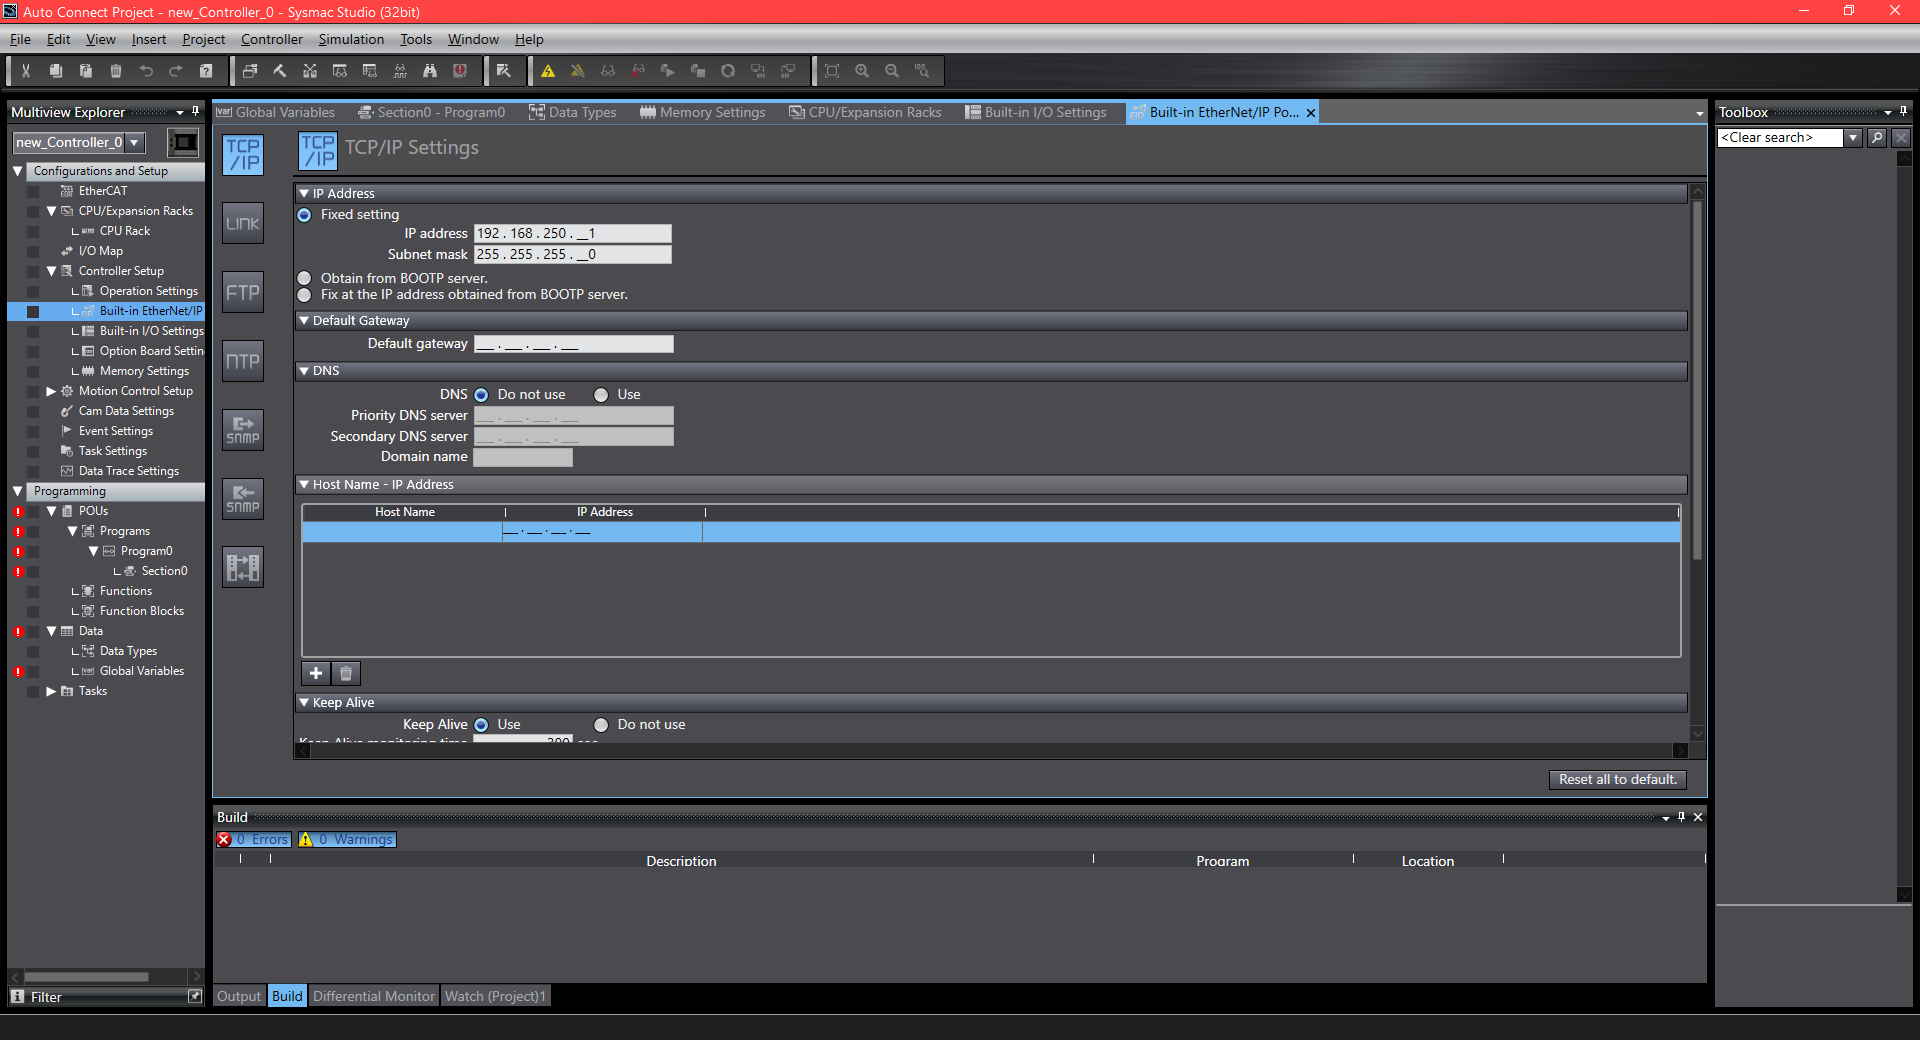 Omron PLC — Built-in EtherNet/IP port settings
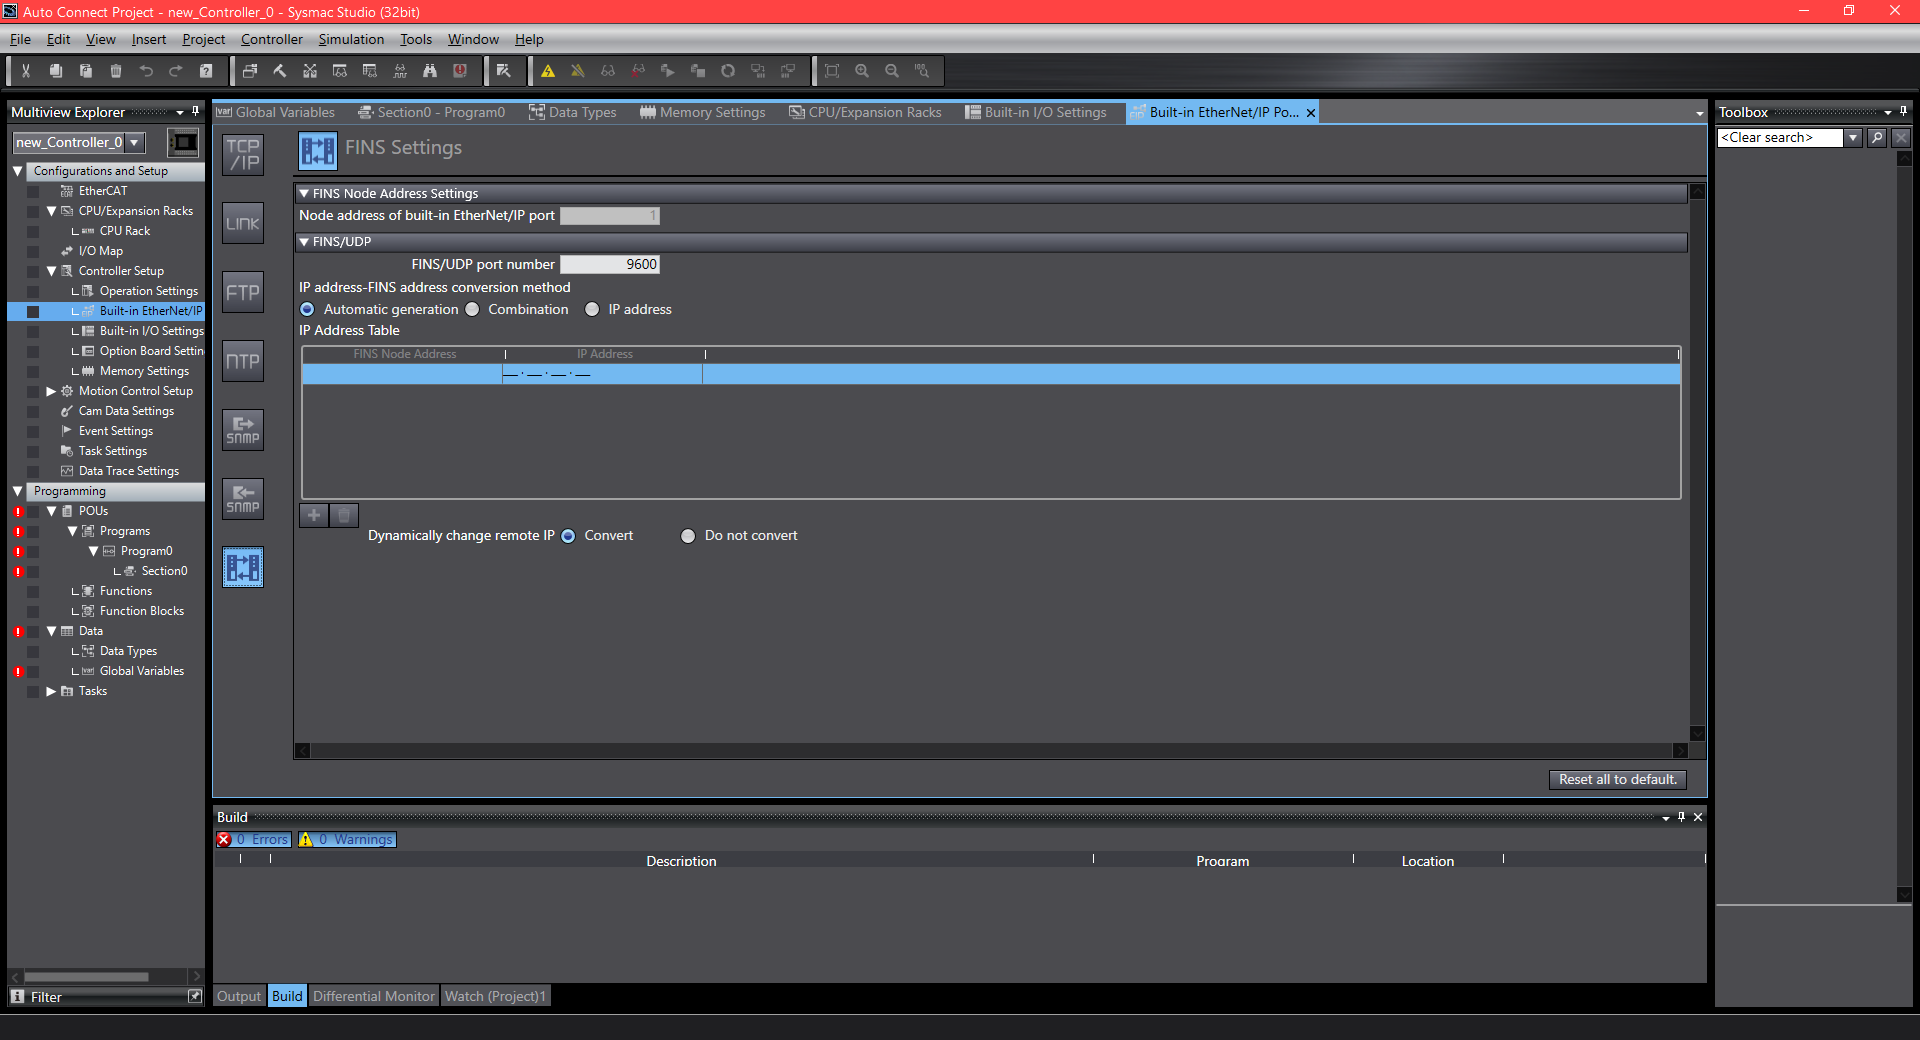 EtherNet/IP port — save configuration
- In the Programming section, go to Data → Global Variables and define the variables to expose.
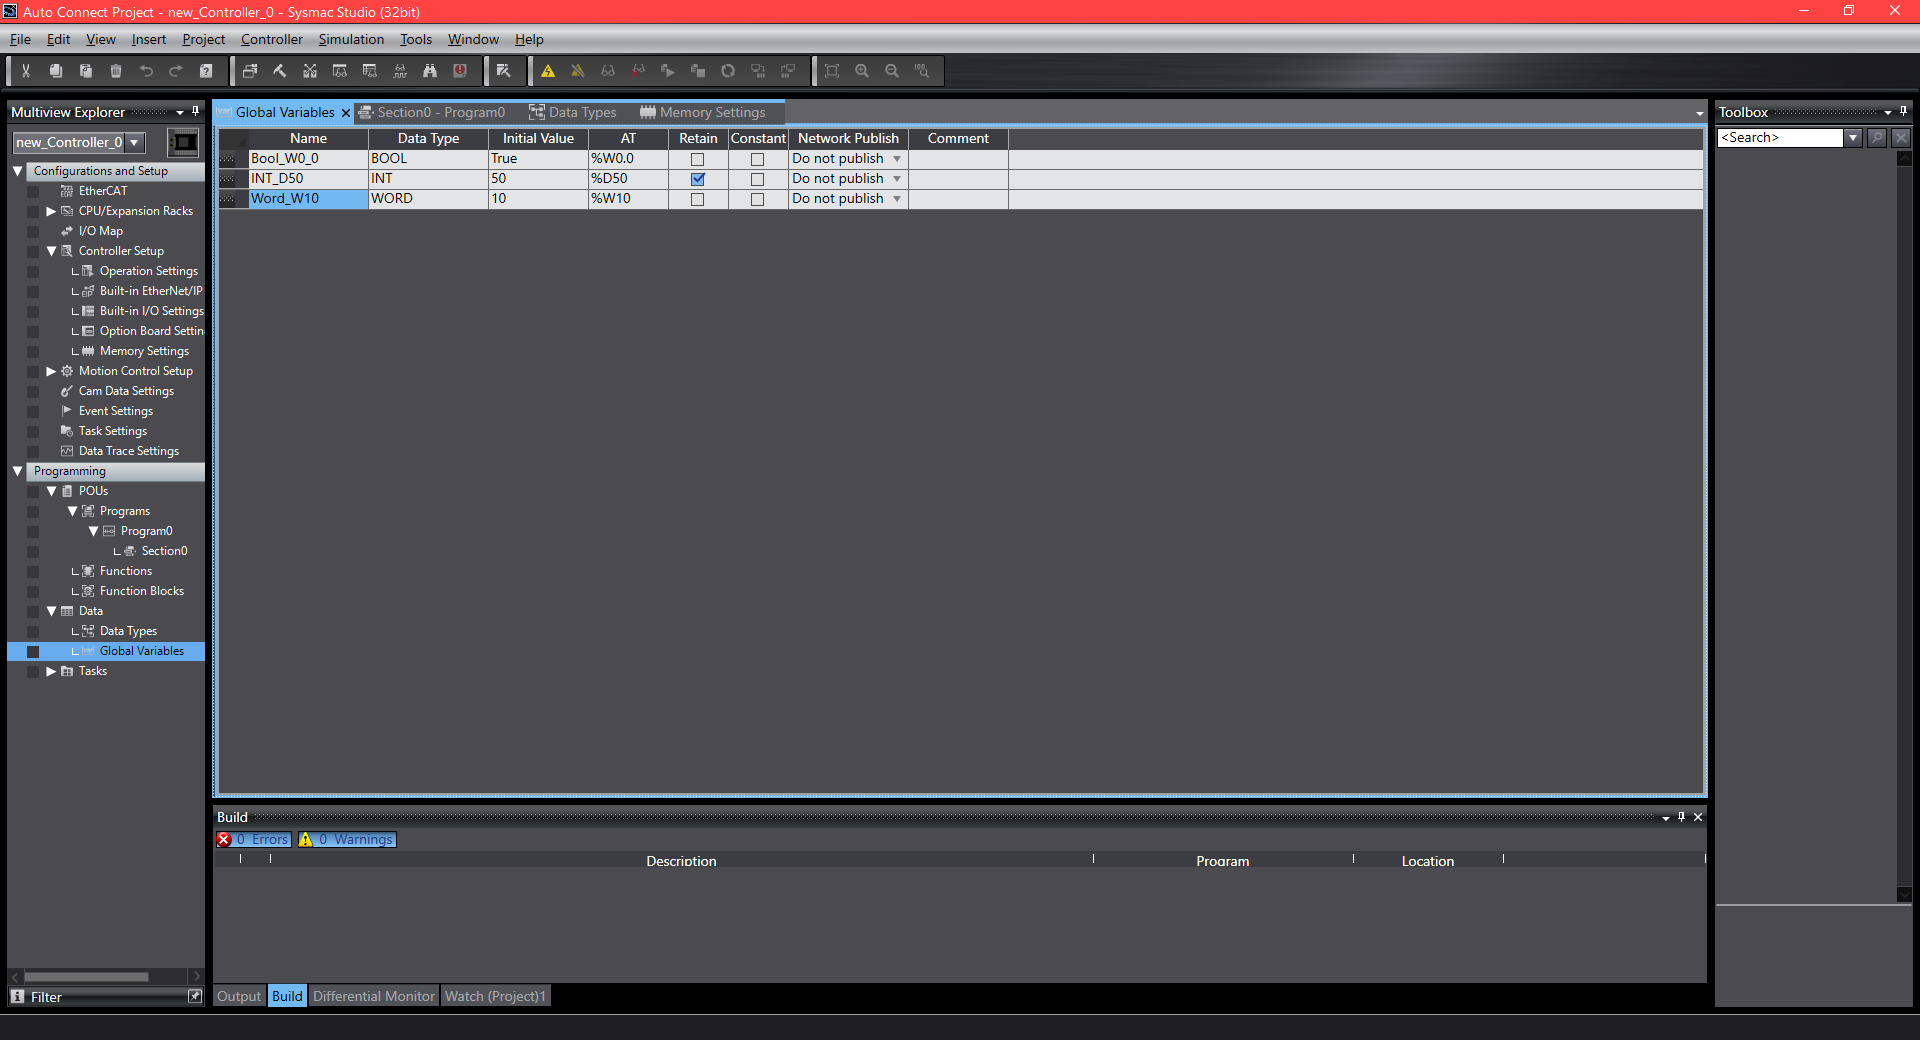 Programming → Data → Global Variables
Verifying the Connection
Section titled “Verifying the Connection”- Go to Status → Tag. A green OK under Status confirms the connection. The Last Value column shows live data from the PLC.
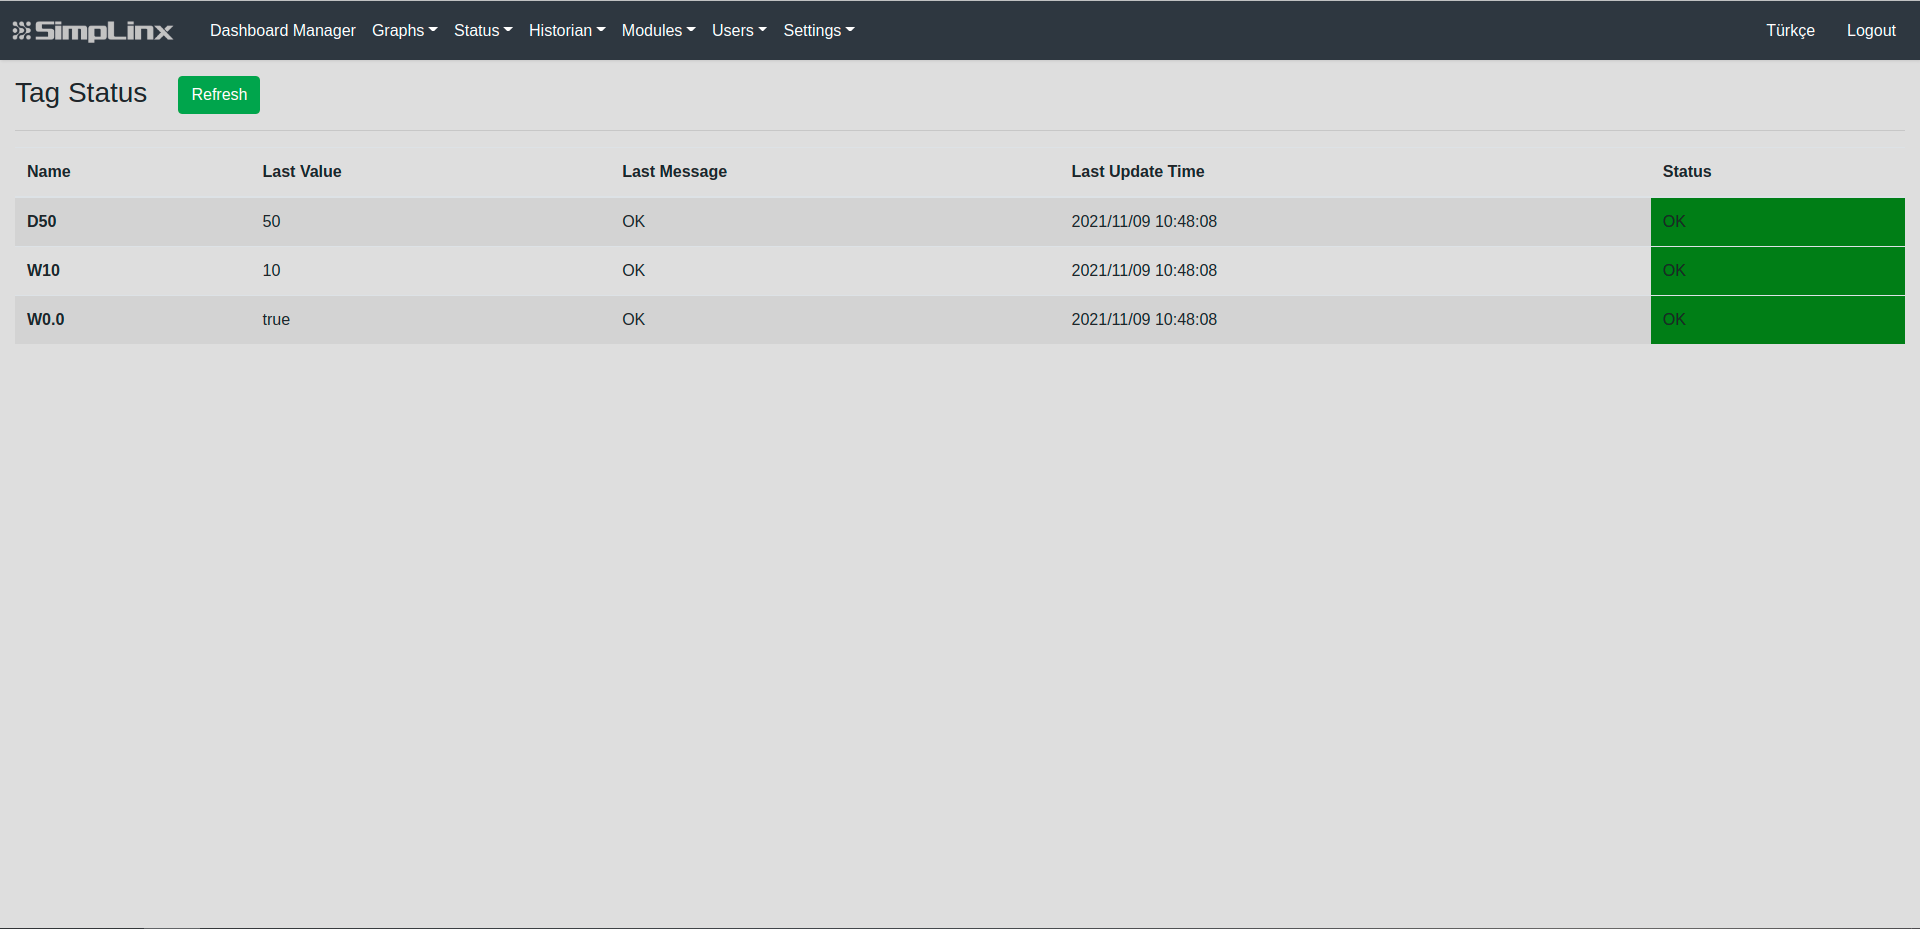 Status → Tag — green OK and live Last Value confirm successful connection
You can also adjust Memory Settings in Controller Setup.
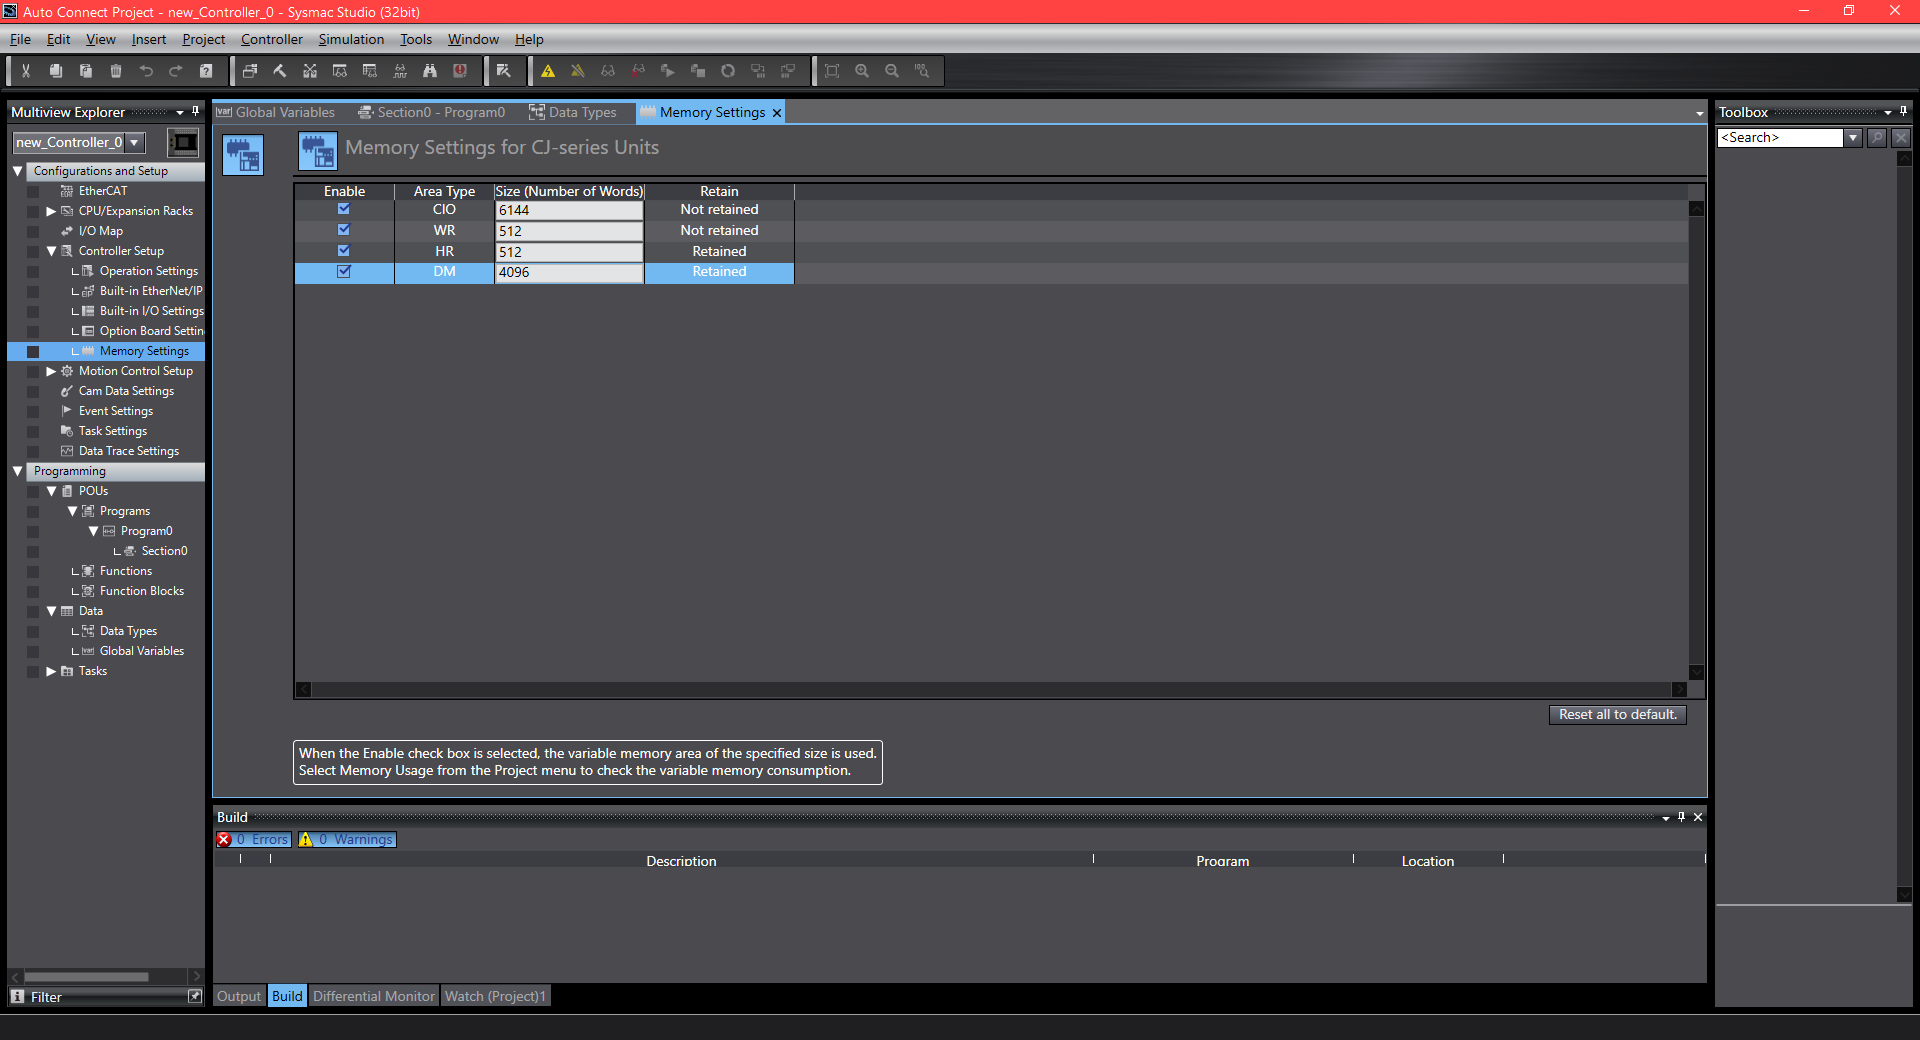 Controller Setup — Memory Settings for Omron FINS